OgoulLMS FAQs - Organization
Super admin can add / edit / delete the schools under one organization. Every school has its own login credentials and by logging their own account, the school can manage its own data (students, teachers, class schedules, assignments, exams, datasheets, announcements, libraries, holidays and finance).
1.Click the All Schools

2. Click the Add New School

Super admin can add / edit / delete the courses against each class. He can also add the units and duration of the completion of the units.
He can also add the lessons and completion duration of each lesson under each unit.
1.Click the Curriculum -> Courses List

2.Click the Add New Course

Super admin can add / edit / delete grades and see the list of courses under each class.
1.Click the Curriculum ->Grades

2. Click the Add New Grade

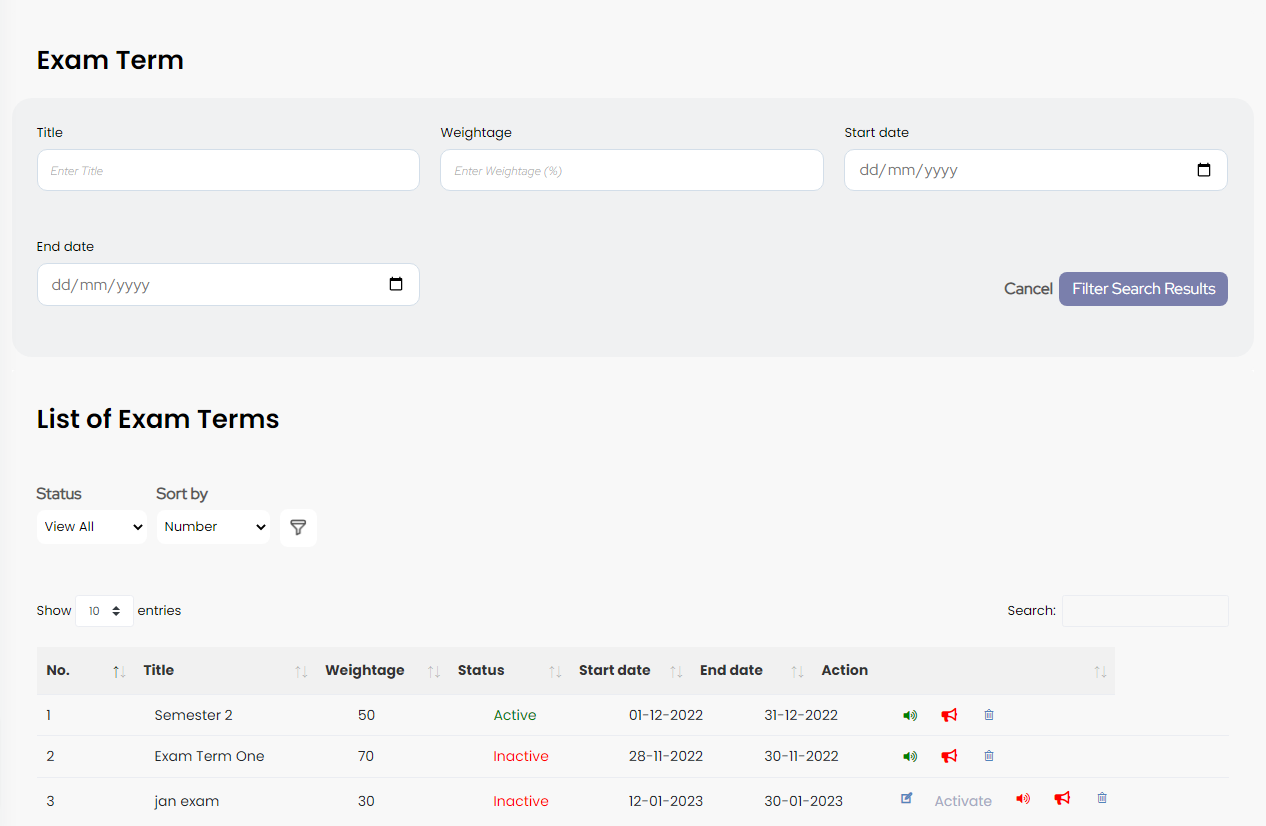
Super admin can add / edit / delete the exam terms. He can also give the exam title, start and end date and weightage.
He can activate or de-activate any exam terms and can announce date sheets and results. Once he announces date sheets and results then students will be able to see it.
1.Click the Curriculum ->Exam Lists

2.You can manage exam here
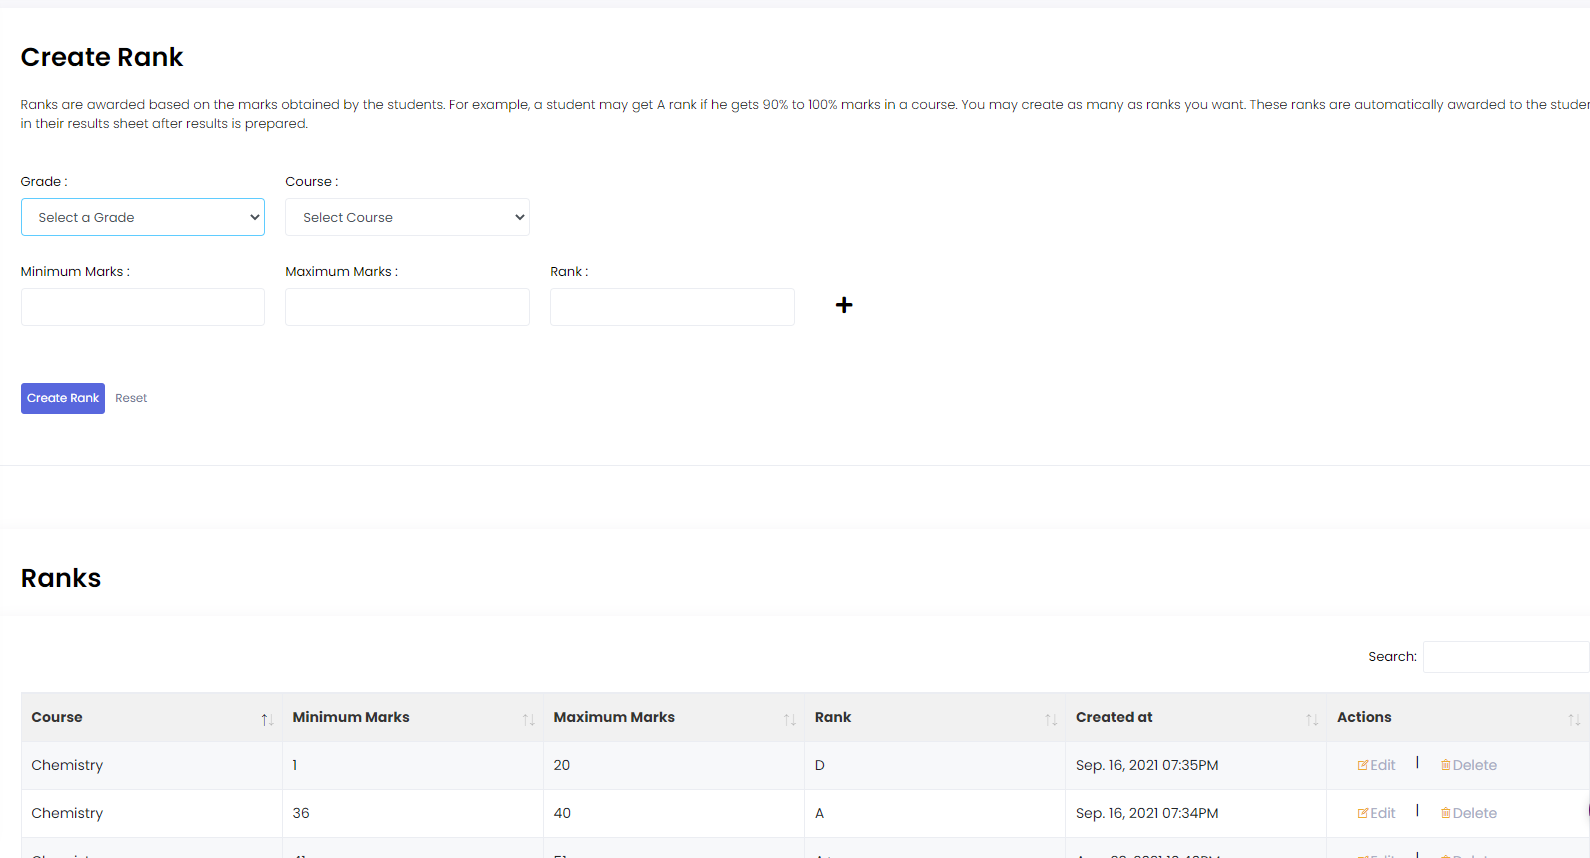
Super admin can add / edit / delete the rank against each course. He can define the minimum and maximum marks against each rank.
1. Click the Curriculum ->Rank Generation

2. You can manage rank here
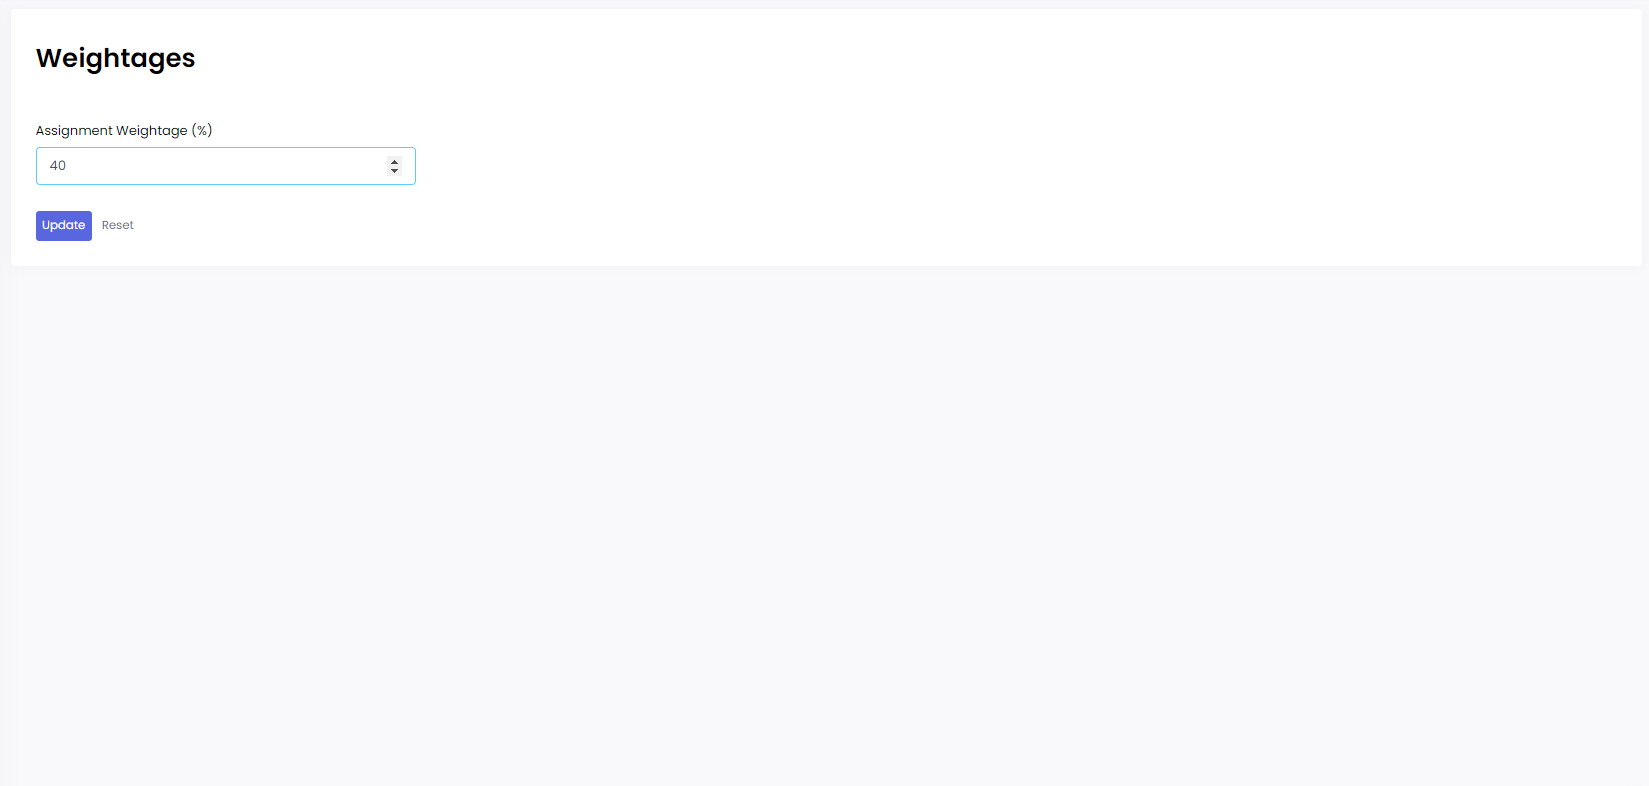
Super admin can define the weightage against assignment and quiz.
1. Click the Curriculum ->Weightages

2. You can define Weightages here
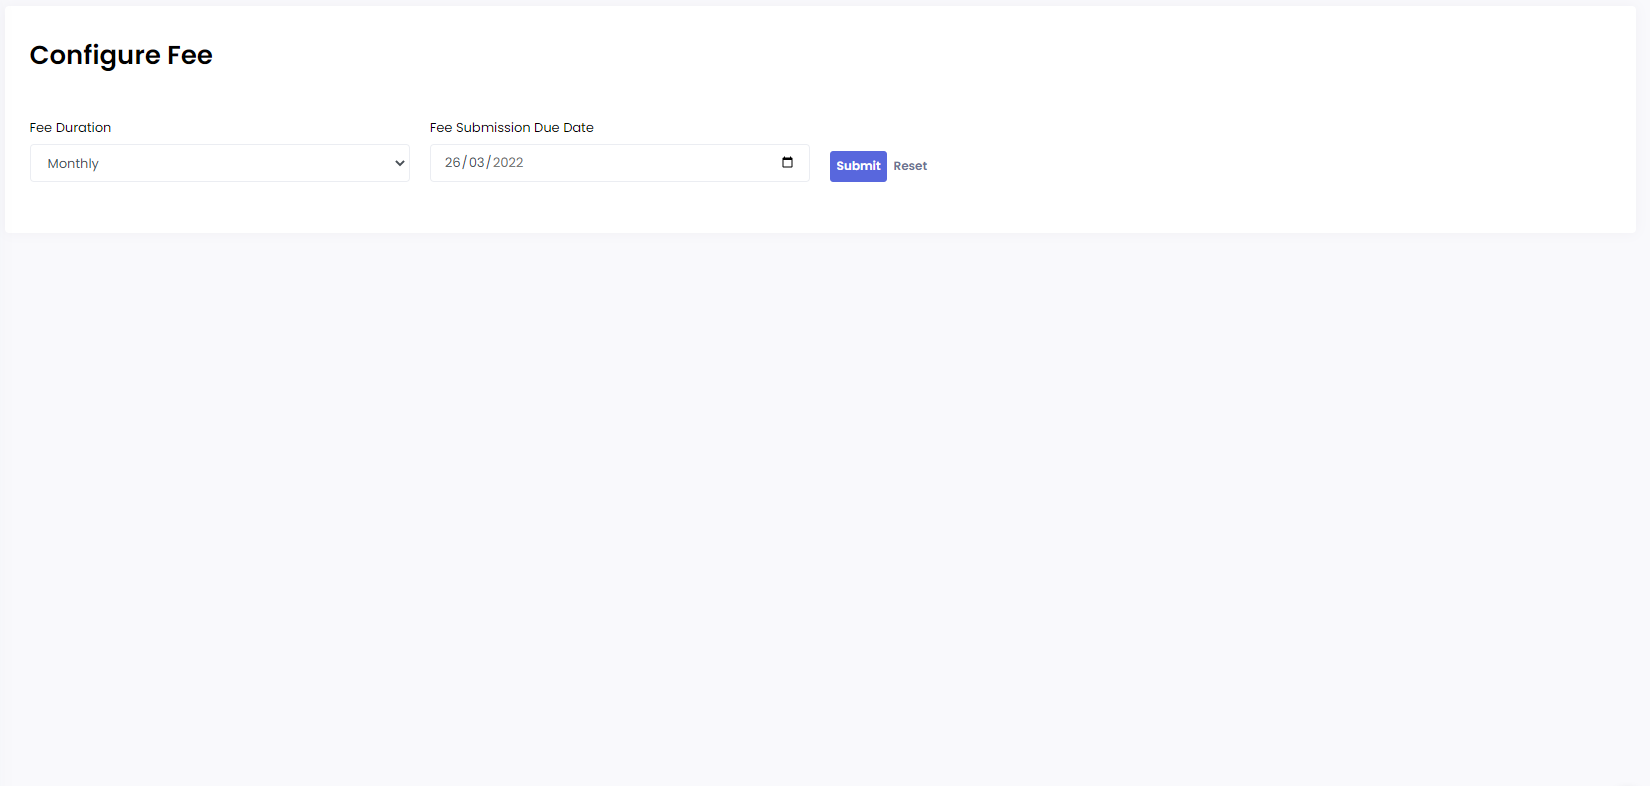
Super admin can schedule the fee either monthly or semester vise. Also he can set the last date of fee submission.
1. Click the Fee Configuration ->Configure Fee

2. You can configure fee here
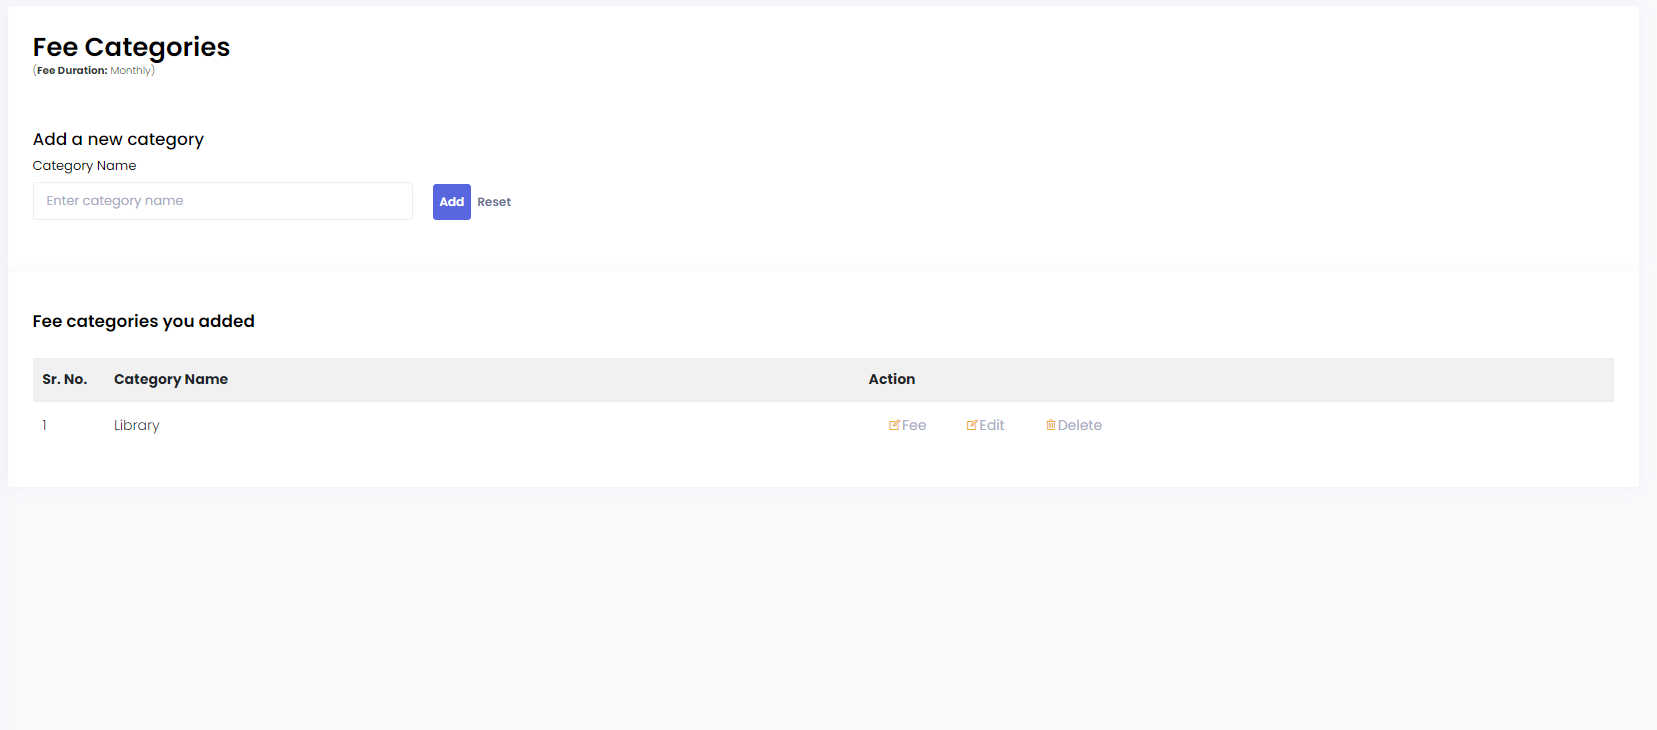
Super admin can define the fee categories like Admission fee, library fee, tuition fee etc. Also he can add fee amount against each category.
1. Click the Fee Configuration ->Fee Categories

2. You can define fee categories here
OgoulLMS FAQs - School
OgoulLMS School:
OgoulLMS allows you to register yourself and start studying online. Via OgoulLMS school portal you can view your students in school. You can add or remove a student, check their performance and history of the grades. Also you can manage their courses.
-
Click on the dashboard option on the top-left side of the portal.
- An option of downward arrow will be given with the English option at the top navigation bar.
-
Open it and you can switch to the other language.

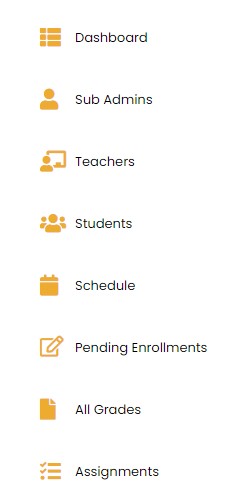
OgoulLMS has made it easy for the school administration to keep a check on all the administrative tasks. You can view a complete daily schedule of grades in the form of a timetable automatically created through OgoulLMS. To open the schedule of school, follow following steps.
- Bring your cursor to the left side of the page.
-
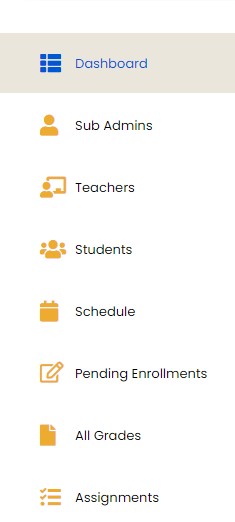
A menu will open, click on the option “Dashboard”.
-
Here you can view the daily time table of the school along with the status of the grade.

To view the main course list of school,
- Click on the left side of the page. A menu will open.
- A menu will open, from this menu
-
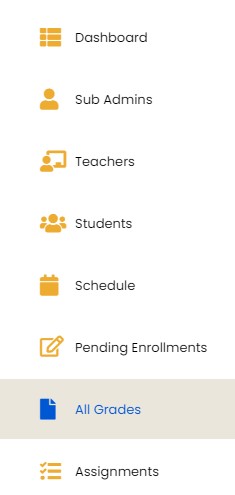
Click on “All Grades” option.
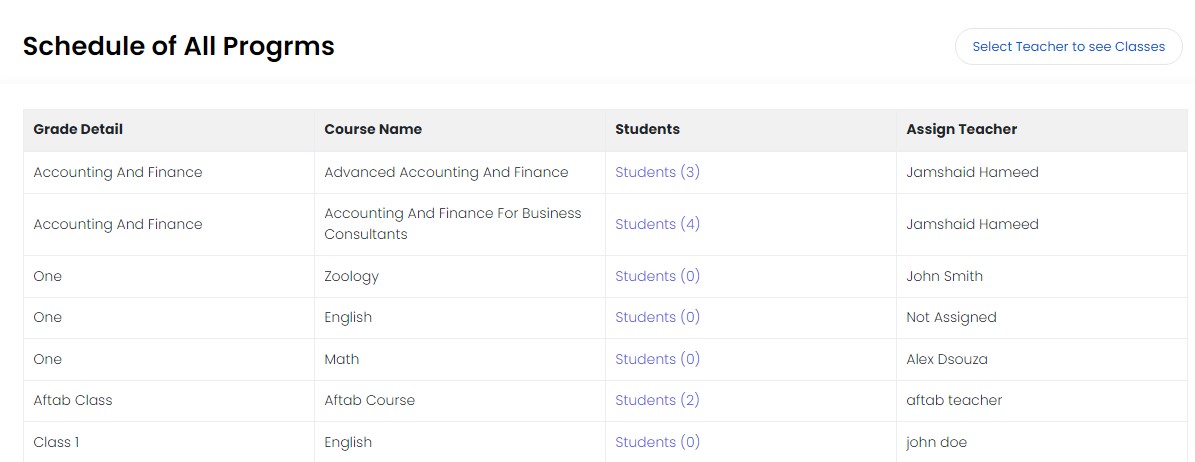
Here you can view the list of grades, courses, number of students and the teachers assigned to these courses.
To change the teacher of course,
- Click on the left side of the page. A menu will open.
-
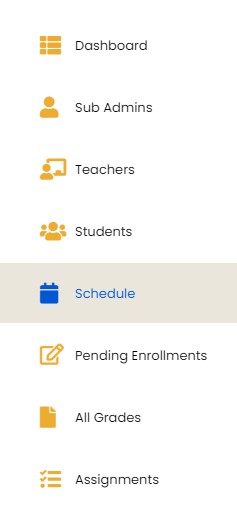
Click on “Schedule” option
-
Here you can view the list of sections, assigned teachers, time slots and number of students.
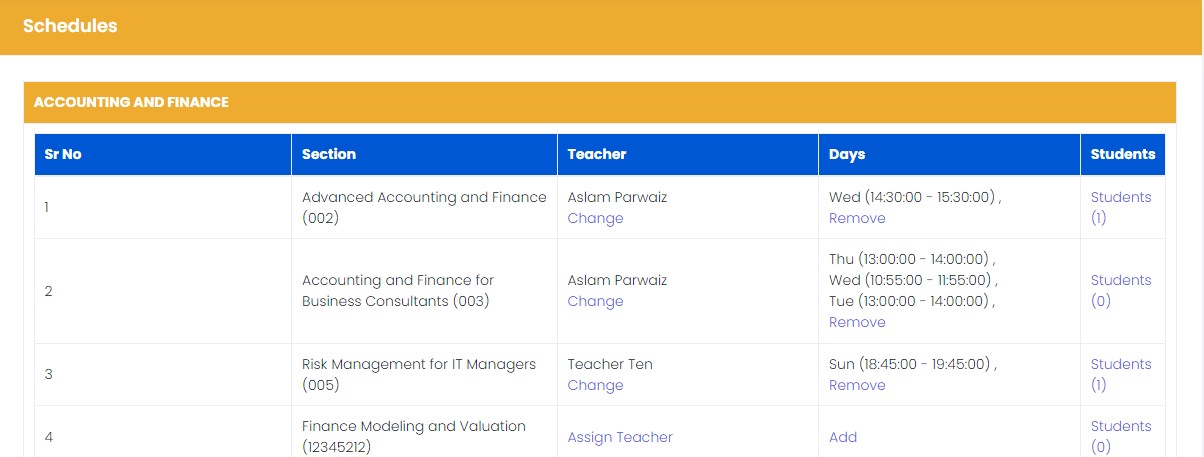
- Click on “Change” to change the teacher.
- A window will appear to select a teacher and click on teacher name.
-
A list of teachers will open up.
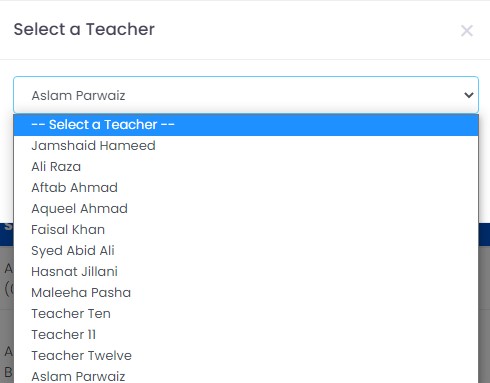
- Select a teacher to assign to the section and click “Assign” button.
-
A success message will be shown upon successful operation.

To change the teacher of course,
- Click on the left side of the page. A menu will open
-
Click on “Schedule” option

-
Here you can view the list of sections, assigned teachers, time slots and number of students.

- Click on “Add” option under “Days” column to remove the time slots.
-
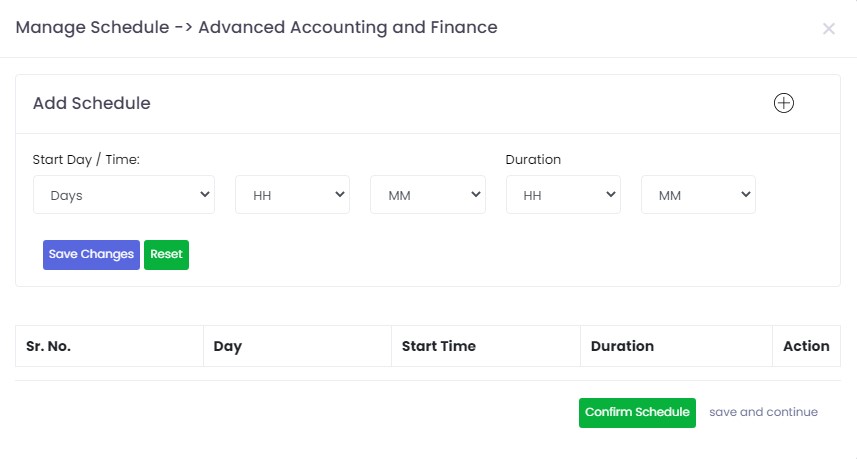
A Form will appear.
-
Add time slots for different days in which course classes are scheduled and save every time slot.
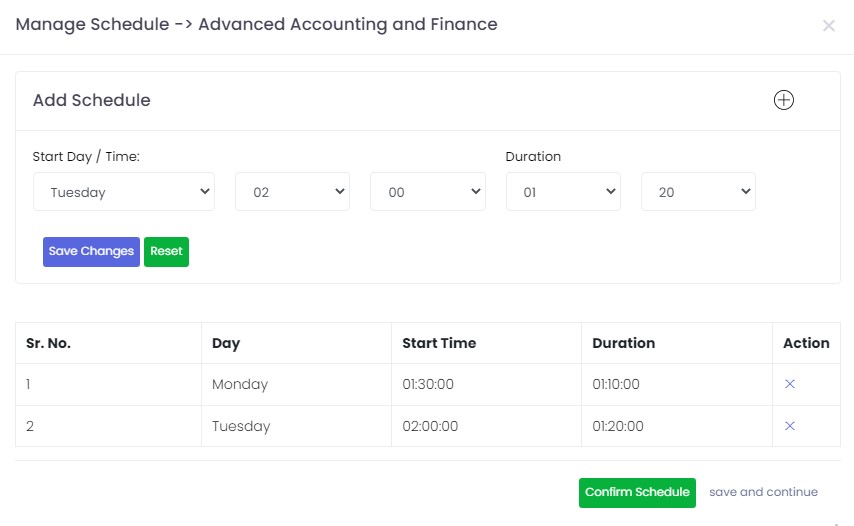
- Click on “Confirm Schedule” button and confirmation message will be shown.
To view the list of teachers working in the school:
- Click on the left side of the page. A menu will open
-
From this menu, click on “Teachers”.
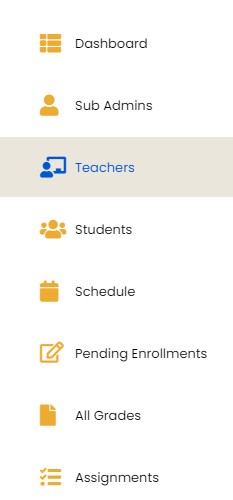
- A list of teachers will open up.
-
You can view the list of teachers.
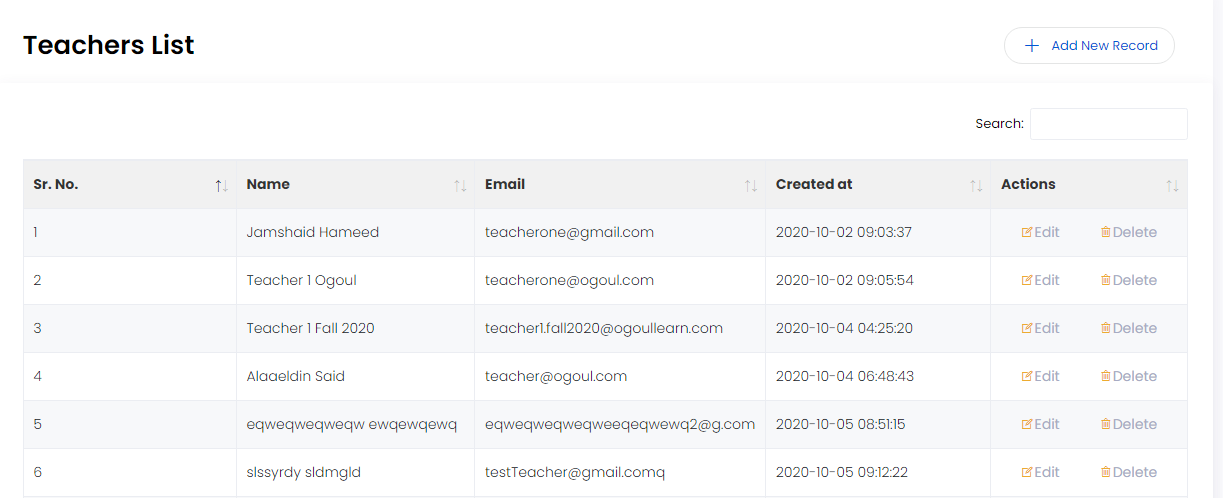
To add new teachers to the list of teachers working in the school:
- Click on the left side of the page. A menu will open
-
From this menu, click on “Teachers”.
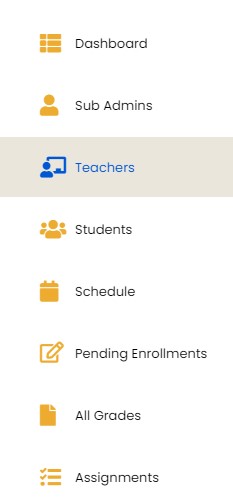
-
A teachers List page will open in front of you.
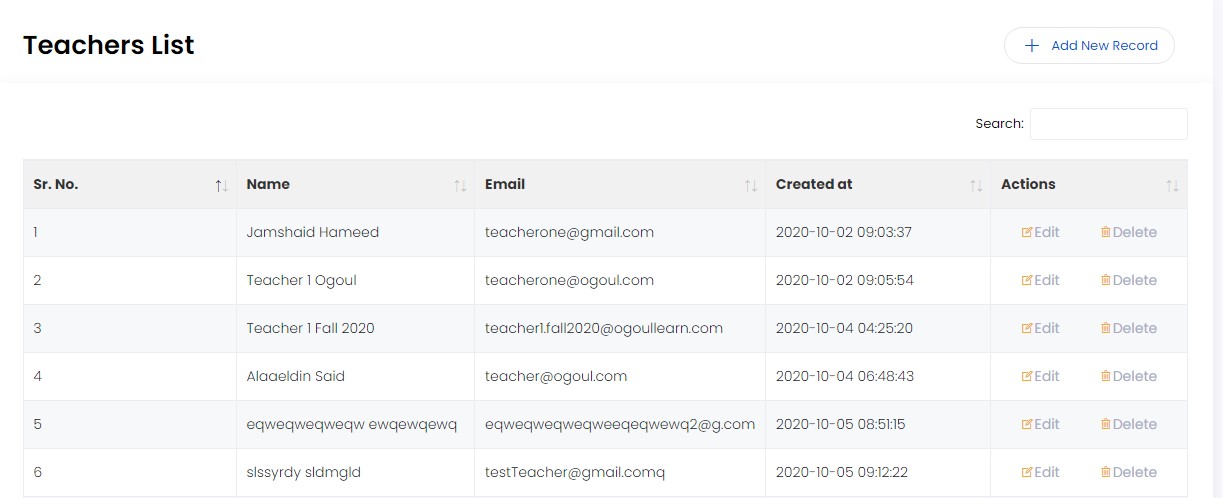
- Click on “+ Add New Record” button on top right corner of the page.
-
Create teacher form will in front of you.
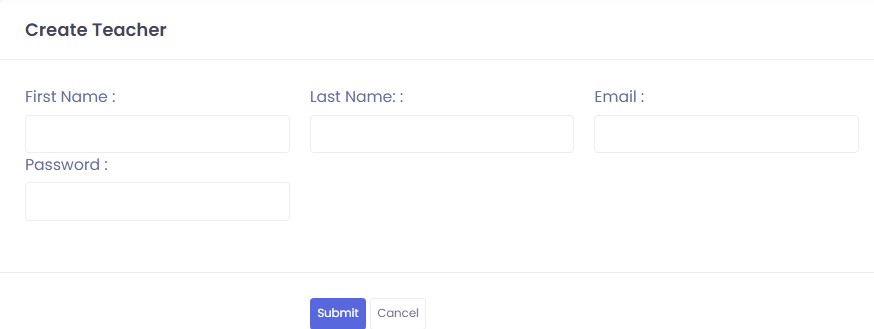
- Add the first name, last name, email and the password of teacher.
- At last, click on the dark blue ‘Submit’ button.
- Now the record of new teacher is saved.
To delete data of the teacher, follow following steps:
-
First select the option of ‘Teachers’ from the main menu.

-
A teachers List page will open in front of you.

- Click on the option of ‘Delete’ against the record which you want to delete.
- A notification will pop up on the screen, click on ‘OK’.
-
Click on the option of ‘OK’.

To edit data of the teacher, follow following steps:
-
First select the option of ‘Teachers’ from the main menu.

-
A teachers List page will open in front of you.

- Select “Edit” option against the teacher’s name, you want to edit.
-
Edit teacher form will be opened on the screen

- Now edit the information that needs to alter.
-
Click on the blue colored ‘’Submit’’ option to edit.

- “Teacher Updated Successfully” message will be shown.
To view the list of students in the school:
- Click on the left side of the page. A menu will open
-
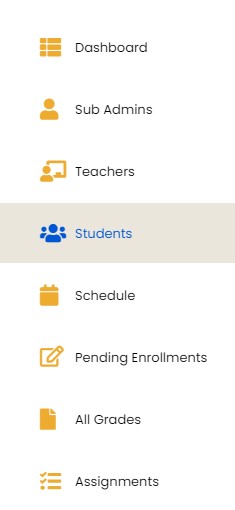
A menu will open, from this menu, click on “Students”.
-
Students list will be in front of you.
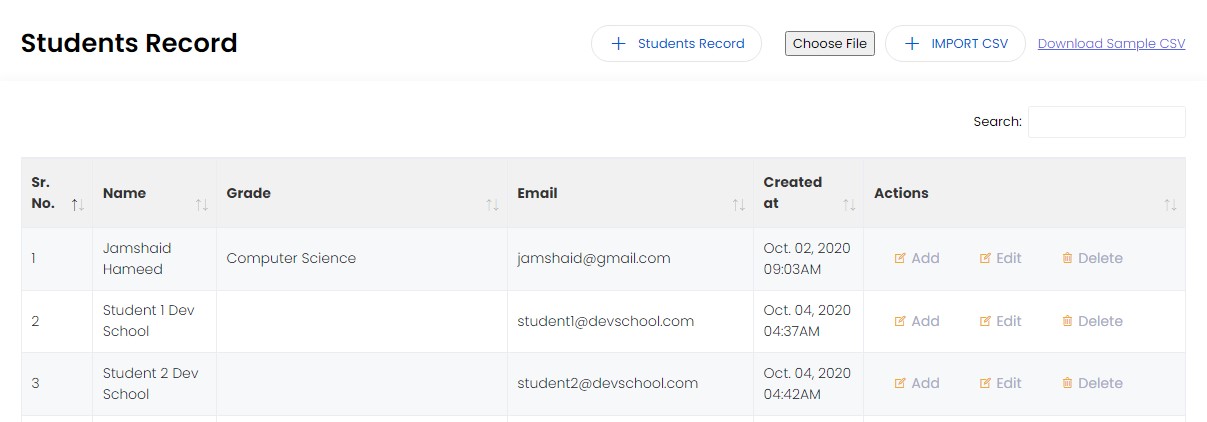
To add new students to the list of students in the school:
- Click on the left side of the page. A menu will open
-
A menu will open, from this menu, click on “Students”.

- Students list will be in front of you.
-
Click on the blue colored button of ‘+ Students Record’ on the top.

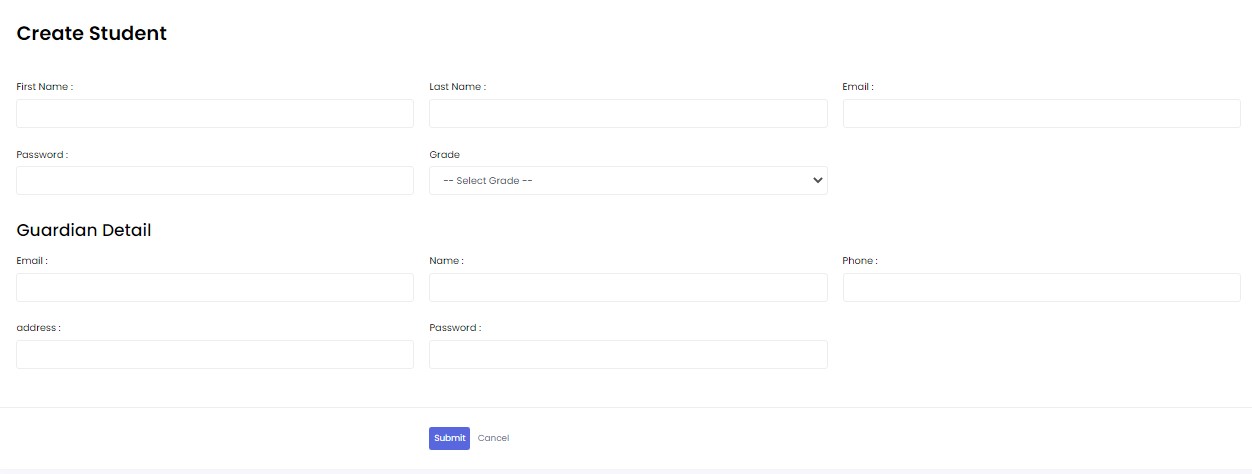
- Create student form will open up.
-
Enter their first name, last name, email, password, grade and other relevant information.
- Click on the blue colored ‘Submit’ option.
- You can also add new students by choosing a file from your device.
-
The option import CSV from device is also given

To delete a student, follow the following steps
- Click on the left side of the page. A menu will open
-
A menu will open, from this menu, click on “Students”.

-
A list of students will be visible to you.

- Click on the option of ‘Delete’ in front of the student’s name which you want to delete.
-
A notification will pop up on the screen, click on ‘OK’.

admin.To edit student information on OgoolLMS Portal, follow the following steps:
- Click on the left side of the page. A menu will open
-
A menu will open, from this menu, click on “Students”.

-
A list of students will be visible to you.

- Click on the option of ‘Edit’ in front of the student’s name.
-
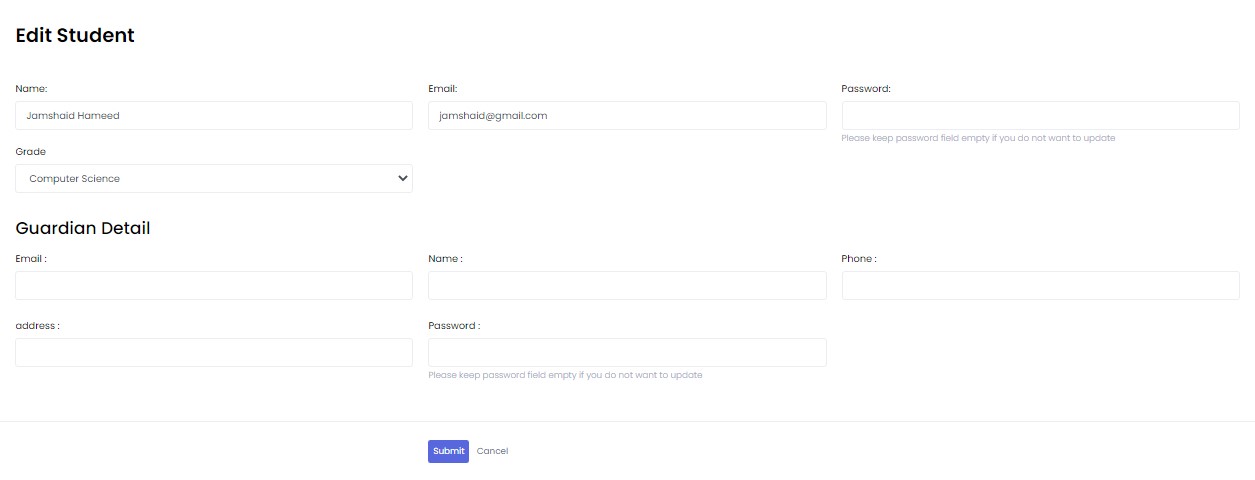
Now you can edit student’s name, email, password, grade and guardian details.
- Click on the blue colored ‘Submit’ option.
- Success message will be shown on the top right corner.
OgoulLMS Portal allows you to import existing students list and let you save your time.
- Click on the left side of the page. A menu will open
-
A menu will open, from this menu, click on “Students”.

-
Students list will be in front of you.

- Click on the option of ‘Choose File’.
- Select the student data file from the device.
- You can also import CSV files.
- Success message will be shown on the top right corner.
You can view all the grades that are assigned to a particular teacher. Follow the following steps:
- Click on the left side of the page. A menu will open
-
A menu will open, click on “All Grades”.

-
A complete list of grades scheduled for the school will open up.

You can view all the grades that are assigned to a particular teacher. Follow the following steps:
- Click on the left side of the page. A menu will open
-
A menu will open, click on “All Grades”.

-
A complete list of grades scheduled for the school will open up.

- Click on “Select Teacher to see Classes” on the top right corner.
-
Select teacher popup will be shown.
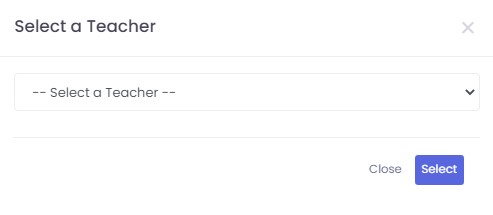
- Select a teacher from the opened list and click on “Select” button.
-
A list of all grades for a specific teacher will be shown.

OgoulLMS Portal is very convenient to use. You can easily change a teacher. To delete a teacher follow the following steps:
- Click on the left side of the page. A menu will open
-
A menu will open, from this menu, click on “Schedule”.

-
A list all grades will be visible to you on the screen
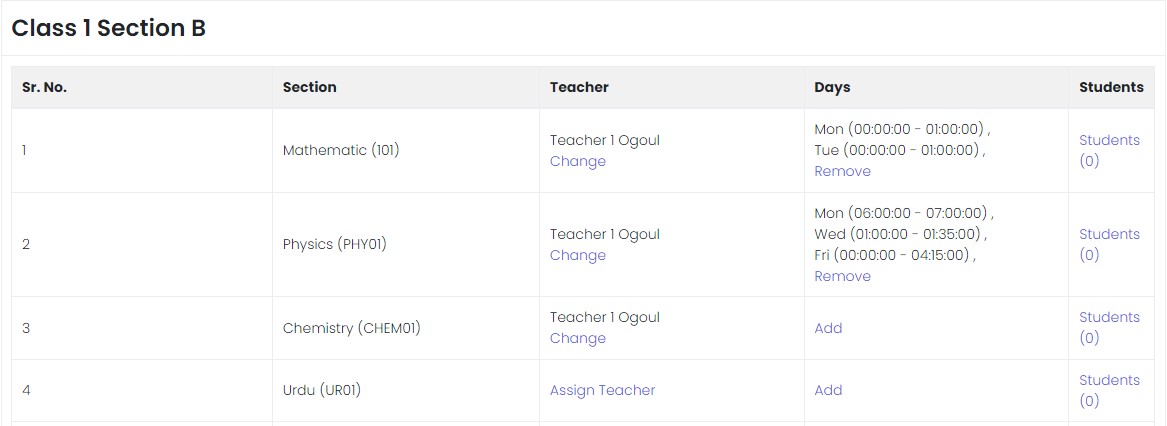
- Click on the ‘Assign Teacher’ option under the column of ‘Teacher’.
-
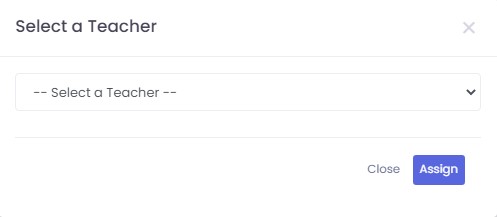
Select teacher from popup menu and click on “Assign” button.
-
Success message will be shown on the top right corner.

OgoulLMS Portal is very convenient to use. You can easily change a teacher. To delete a teacher follow the following steps:
- Click on the left side of the page. A menu will open
-
A menu will open, from this menu, click on “Schedule”.

-
A list all grades will be visible to you on the screen

- Click on the ‘Change’ option under the column of ‘Teacher’.
-
Select teacher whom you want to assign to the selected course from popup menu and click on “Assign” button.

-
Success message will be shown on the top right corner.

OgoulLMS allows student to send enrollment requests. School can view those enrollments and accept them. To accept the following enrollments, you need to follow the following steps:
- Click on the left side of the page. A menu will open
-
From this menu, click on “Pending Enrollments”.
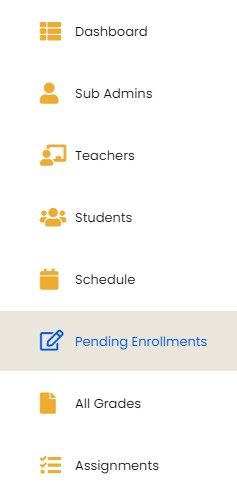
-
You will be able to view the requests sent by students.
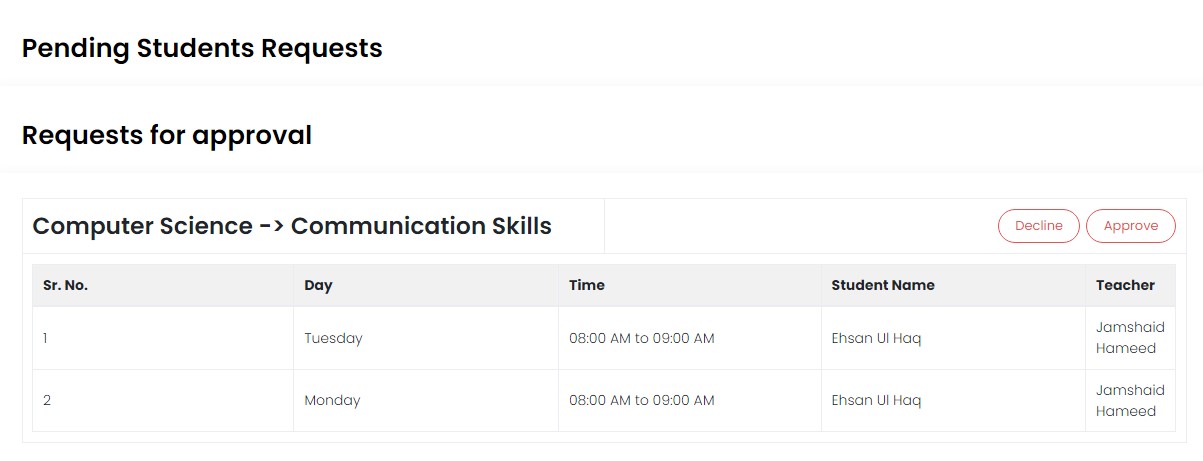
OgoulLMS allows student to send enrollment requests. School can view those enrollments and accept them. To accept the following enrollments, you need to follow the following steps:
- Click on the left side of the page. A menu will open
-
From this menu, click on “Pending Enrollments”.

-
You will be able to view the requests sent by students.

- Click on the red colored ‘Approve’ option.
- A notification will pop up on your screen.
-
Select the blue colored ‘OK’ option.

- Pending student request will be accepted.
OgoulLMS allows student to send enrollment requests. School can view those enrollments and accept them. To accept the following enrollments, you need to follow the following steps:
- Click on the left side of the page. A menu will open
-
From this menu, click on “Pending Enrollments”.

-
You will be able to view the requests sent by students.

- Click on the red colored ‘Decline button.
- A notification will pop up on your screen.
-
Select the blue colored ‘OK’ option.

- Pending student request will be declined.
OgoulLMS allows student to send enrollment requests. School can view those enrollments and accept them. To accept the following enrollments, you need to follow the following steps:
- Click on the left side of the page. A menu will open
- From this menu, scroll down and click on “Exams”.
-
Select “Proctors” option from the opened drop down menu.
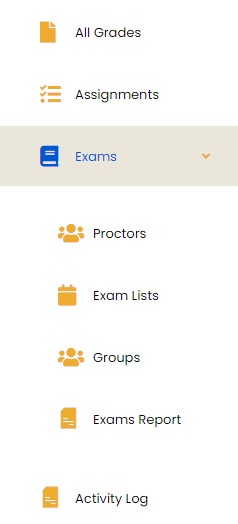
-
You will be able to view the proctors’ record. You would also be able to perform different actions like add proctor, import proctor file from storage, Edit and delete proctor.
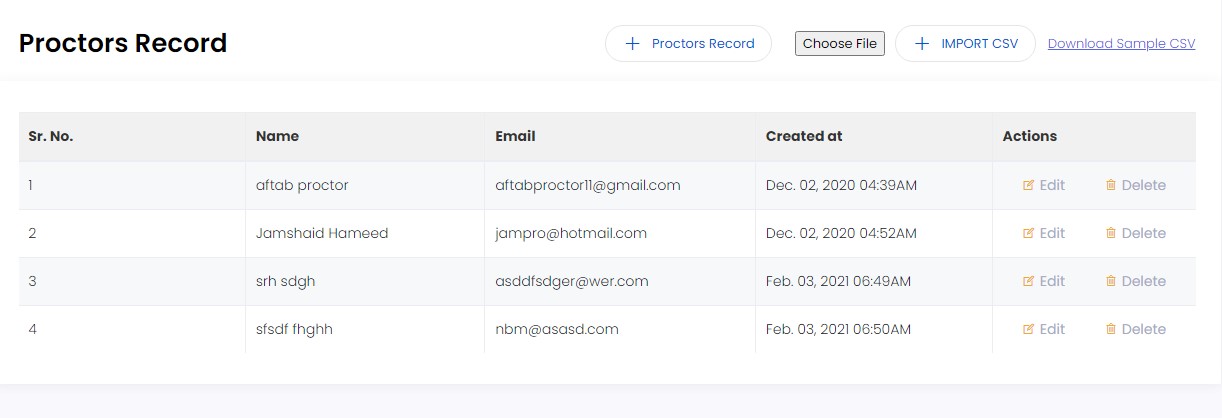
OgoulLMS allows student to send enrollment requests. School can view those enrollments and accept them. To accept the following enrollments, you need to follow the following steps:
- Click on the left side of the page. A menu will open
- From this menu, scroll down and click on “Exams”.
-
Select “Exam Lists” option from the opened drop down menu.

- A form will appear.
- Fill the required fields and click on “Submit” button.
- Term will be visible in the below list of terms.
-
You can check all active and inactive terms, also you can delete and edit terms
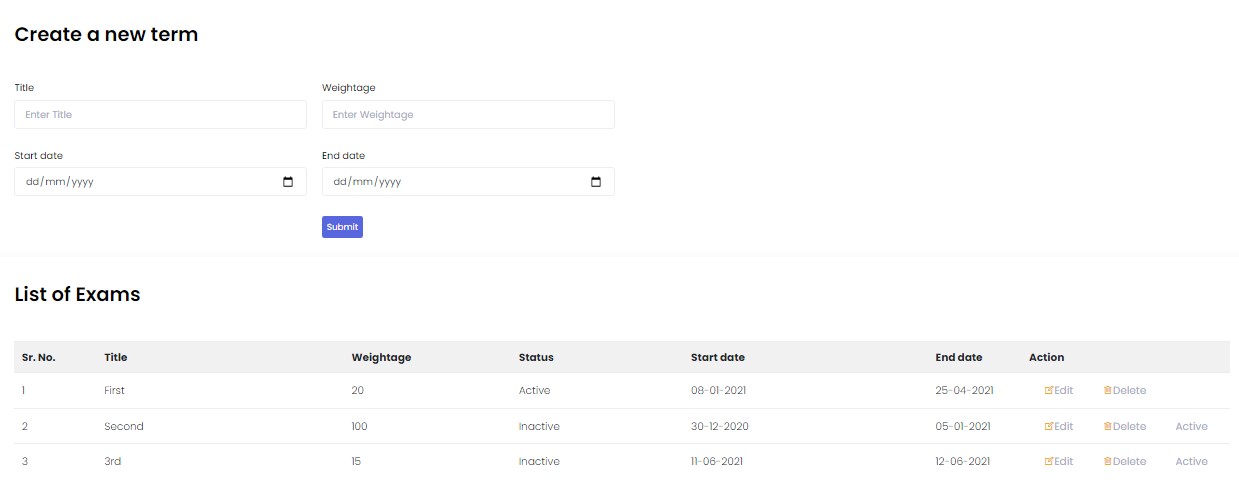
OgoulLMS allows student to send enrollment requests. School can view those enrollments and accept them. To accept the following enrollments, you need to follow the following steps:
- Click on the left side of the page. A menu will open
- From this menu, scroll down and click on “Exams”.
-
Select “Groups” option from the opened drop down menu.

-
You can view groups list, also you can delete and edit groups.
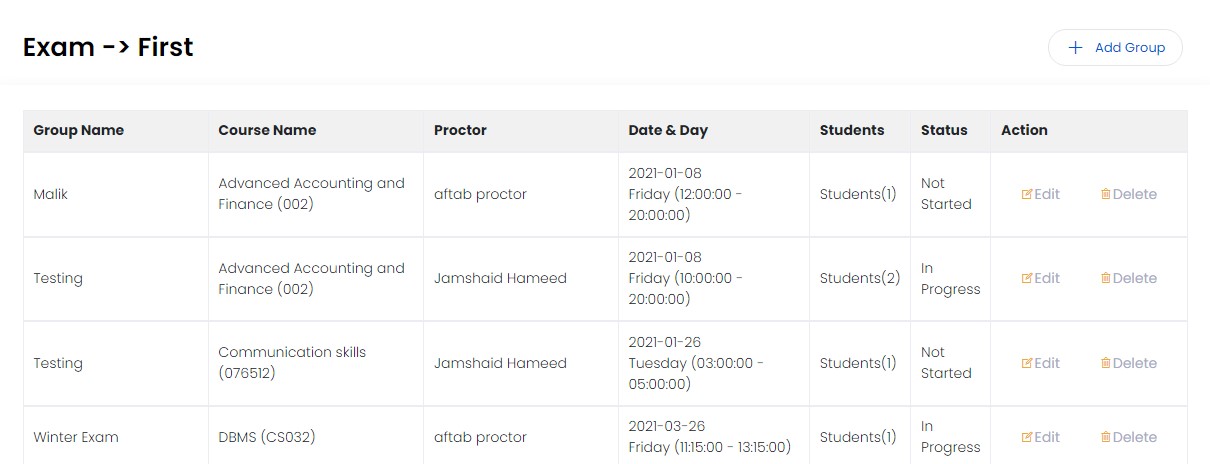
- Click on “Add Group” button at top right corner.
-
Add group form will appear.
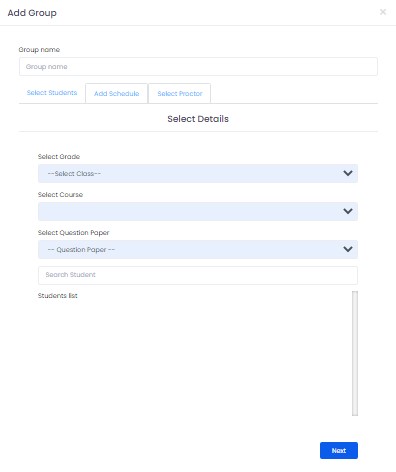
- Fill the required fields and click on “Save Now” button.
- Group will be added successfully.
OgoulLMS allows student to send enrollment requests. School can view those enrollments and accept them. To accept the following enrollments, you need to follow the following steps:
- Click on the left side of the page. A menu will open
- From this menu, scroll down and click on “Exams”.
-
Select “Exams Report” option from the opened drop down menu.

-
Reports list will be shown.

- Click on “Exams Reporting” option.
-
You will able to see Exams Report.

OgoulLMS allows student to send enrollment requests. School can view those enrollments and accept them. To accept the following enrollments, you need to follow the following steps:
- Click on the left side of the page. A menu will open
-
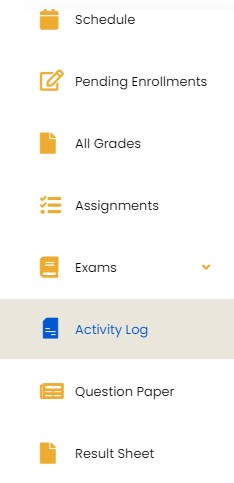
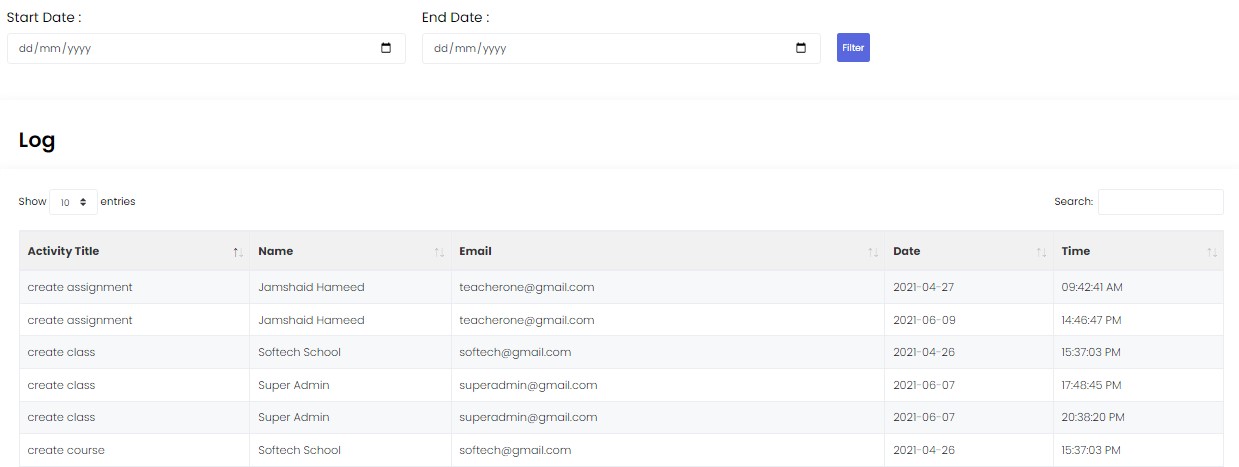
From this menu, scroll down and click on “Activity Log”.
-
You will be able to view the activity log.
OgoulLMS allows student to send enrollment requests. School can view those enrollments and accept them. To accept the following enrollments, you need to follow the following steps:
- Click on the left side of the page. A menu will open
-
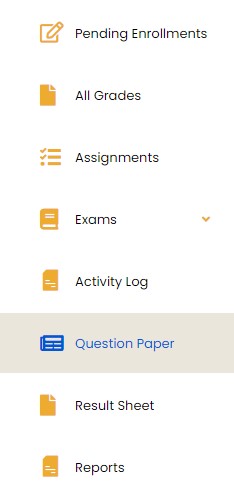
From this menu, scroll down and click on “Question Paper”.
-
You will be able to view the question paper list.

OgoulLMS allows student to send enrollment requests. School can view those enrollments and accept them. To accept the following enrollments, you need to follow the following steps:
- Click on the left side of the page. A menu will open
-
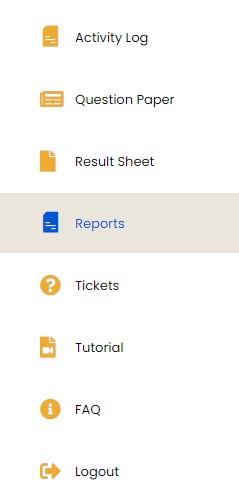
From this menu, click on “Reports”.
-
You will be able to view the report types

- Click on the blue colored ‘Students Reports” option.
-
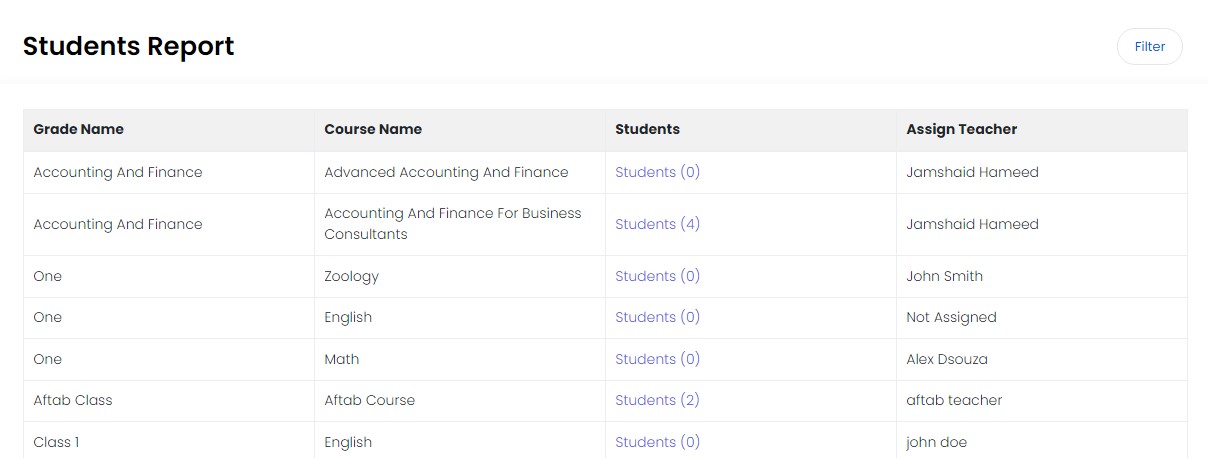
Students Report will be show to you.
OgoulLMS allows student to send enrollment requests. School can view those enrollments and accept them. To accept the following enrollments, you need to follow the following steps:
- Click on the left side of the page. A menu will open
-
From this menu, click on “Reports”.

-
You will be able to view the report types

- Click on the blue colored ‘Students Reports” option.
-
Students Report will be show to you.

- Click on the blue colored “Filter” button at the top right corner.
- Select Teacher, Grade and Course from popup menu.
- Click on “Select” button.
-
You will be able to view filtered students reports.

OgoulLMS allows student to send enrollment requests. School can view those enrollments and accept them. To accept the following enrollments, you need to follow the following steps:
- Click on the left side of the page. A menu will open
-
From this menu, click on “Reports”.

-
You will be able to view the report types

- Click on the blue colored ‘Student Behavior Report” option.
-
Student Behavior Report will be show to you.

OgoulLMS allows student to send enrollment requests. School can view those enrollments and accept them. To accept the following enrollments, you need to follow the following steps:
- Click on the left side of the page. A menu will open
-
From this menu, click on “Reports”.

-
You will be able to view the report types

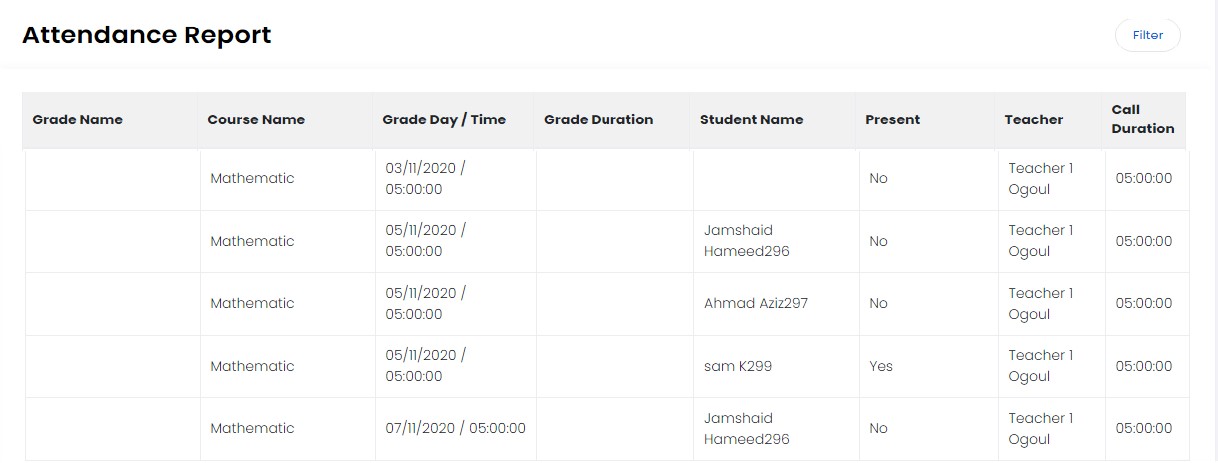
- Click on the blue colored ‘Attendance Report” option.
-
Attendance Report will be show to you.
OgoulLMS allows its students to watch tutorial, to make sure about something watch Tutorial on OgoulLMS portal. To access the tutorial,
-
Move your cursor to the left side of the screen, scroll down and click on the “Tutorial” button.
-
A video player will be visible to you on the screen.
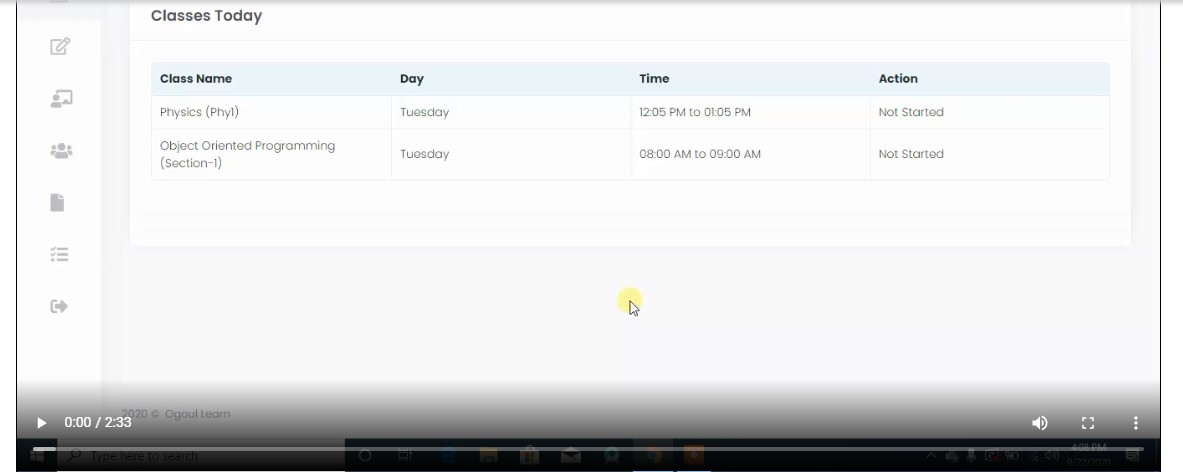
- Click on start button to play the tutorial on your screen.
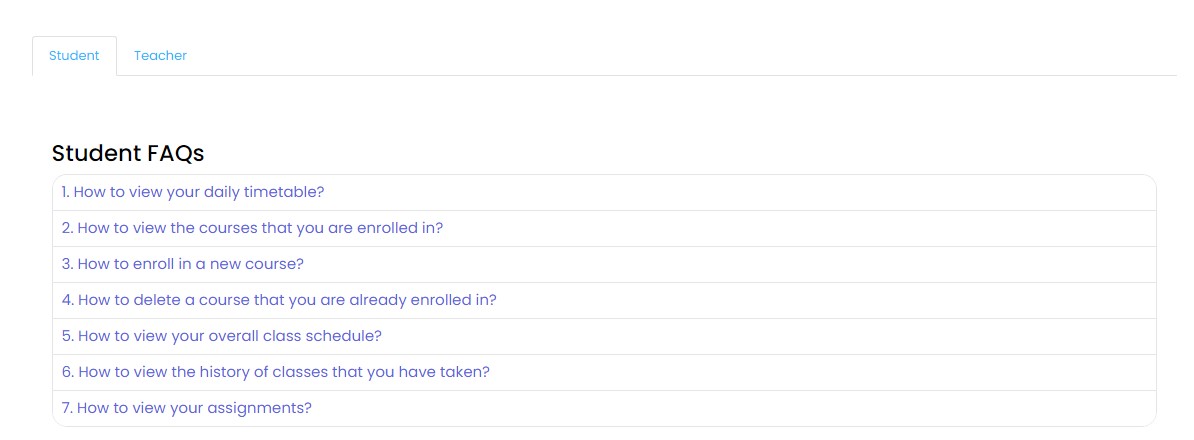
OgoulLMS makes sure that people are using this app comfortably. At times people are not able to find simple features. To make sure about something, visit FAQs section in OgoulLMS. Following are the steps:
-
Move your cursor to the left side of the screen, scroll down and click on the “FAQs” button.
-
A list of FAQs will open up in front of you
OgoulLMS enables you to logout easily. To logout, follow the following steps:
-
Move your cursor to the left side of the screen and click on the “Logout” button.
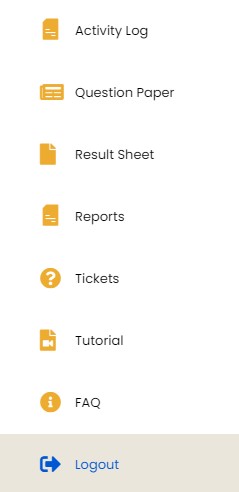
- You will be logged out from the OgoulLMS.
OgoulLMS FAQs - School
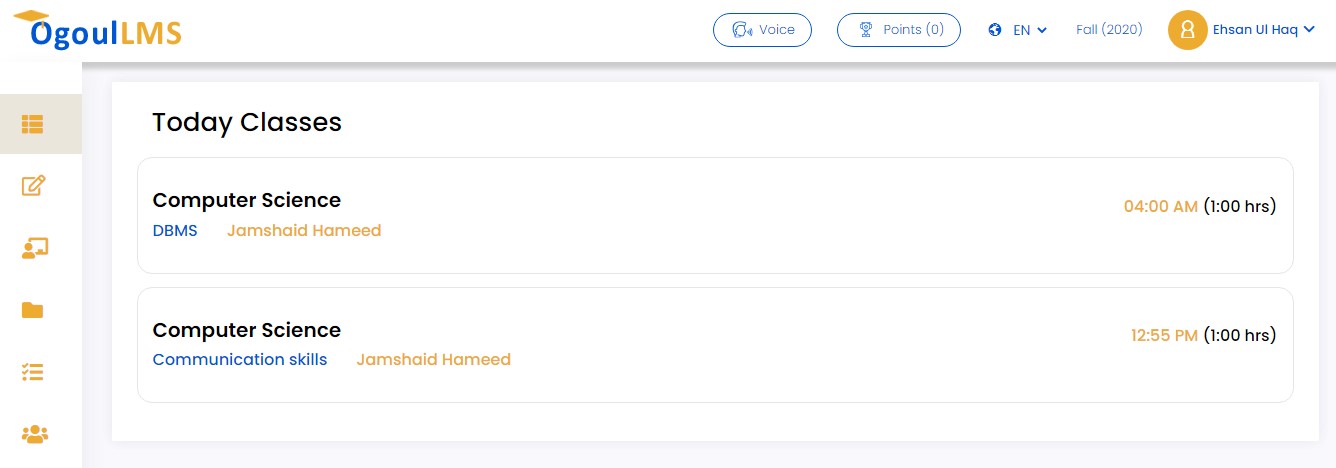
OgoulLMS student portal allows all the students to view their daily timetable on the dashboard.
- You can access the dashboard as soon as you log in.
- If you are on another page and want to open the dashboard.
-
Move your cursor to the left side of the screen and click on the “Dashboard” button.

-
Here you can watch your daily school timetable every day.
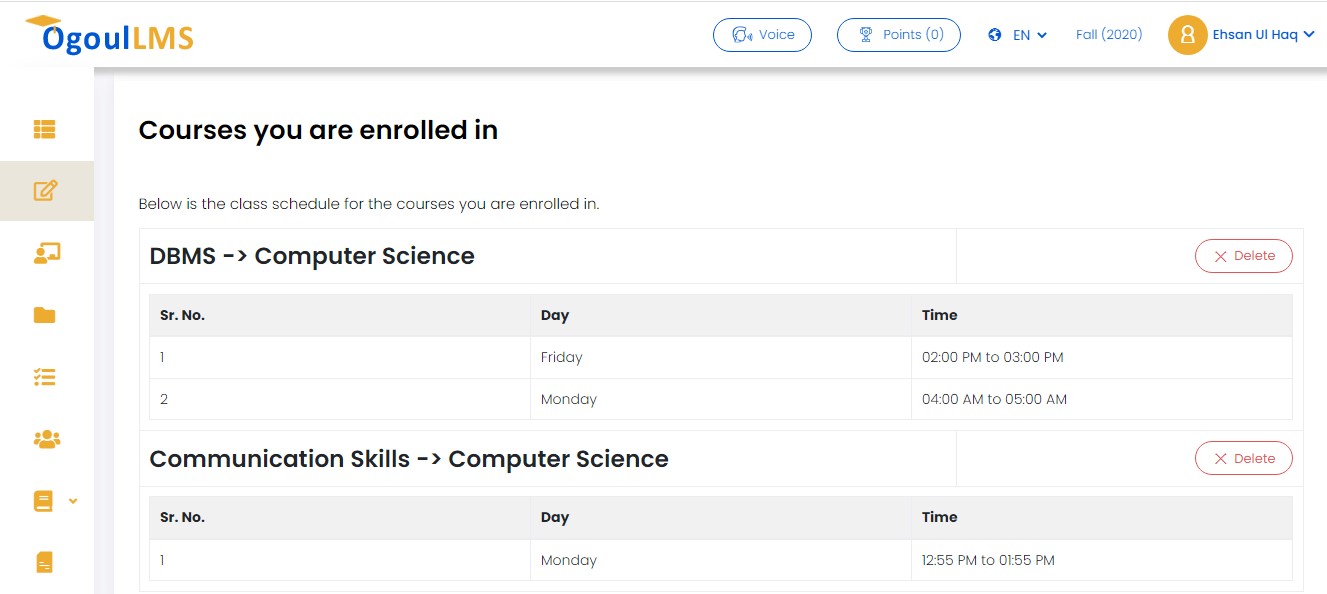
You can view the complete list of courses that you are taking. To do so,
-
Move your cursor to the left side of the screen and click on the ‘’My Courses” button.

-
Here you will find the complete list of courses that you are taking.
Students can easily enroll in different courses through OgoulLMS student portal. To enroll in a course through OgoulLMS,
-
Move your cursor to the left side of the screen and click on the “My courses” button.

-
A form will open, here you can choose the course and grade and then click on the purple colored enroll button to add the course in your list

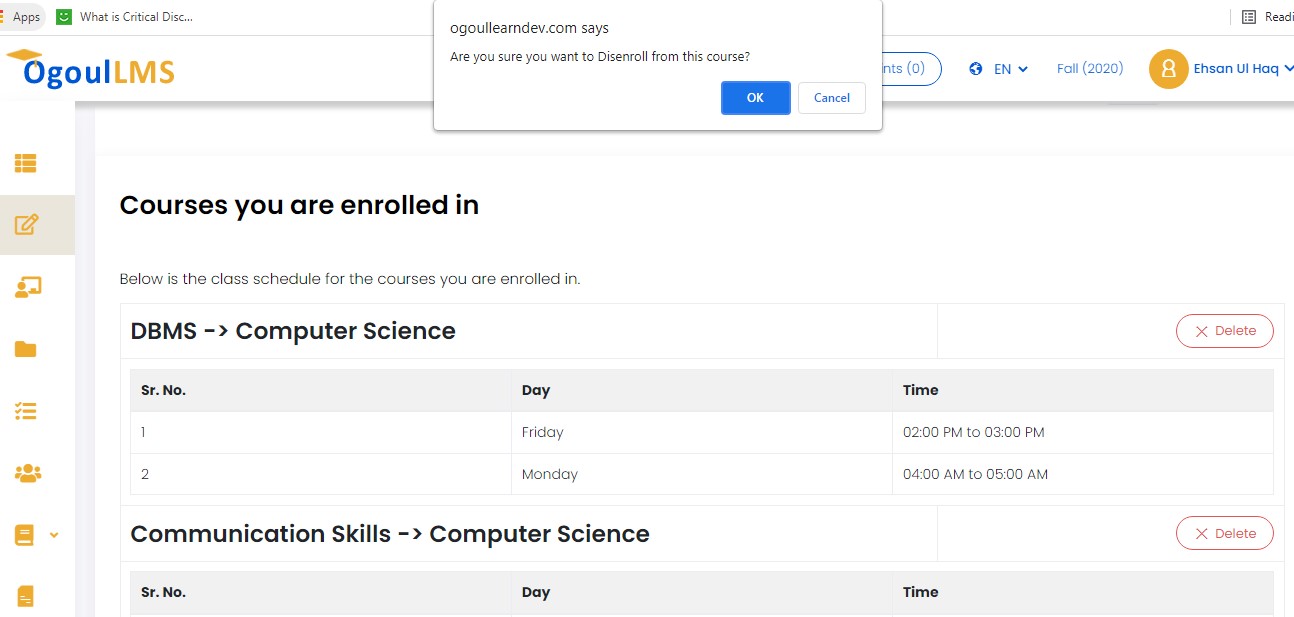
Students can easily delete any course that they are enrolled in through OgoulLMS student portal. To delete a course that you are enrolled in,
-
Move your cursor to the left side of the screen and click on the “My courses” button.

- A list of your courses will open
- Click on the red colored “Delete” button to remove a course from the list.
-
A pop up notification will come on the screen, click on the ‘OK’ button.
OgoulLMS allows its students to view their scheduled exams if any. Follow the following steps to view them.
-
Move your cursor to the left side of the screen and click on the “Exams” button.

-
It will further show you two options; select ‘My Exams’.
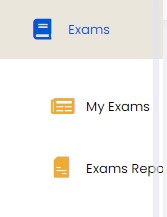
- Your scheduled exams will start appearing under 'My Scheduled Exam'
You can view the attendance report of your grade through OgoulLMS student portal. To do it,
-
Move your cursor to the left side of the screen and click on the “Reports” button.

-
Click on the ‘Attendance Report’ option from the screen.

-
A new screen will open in front of you.

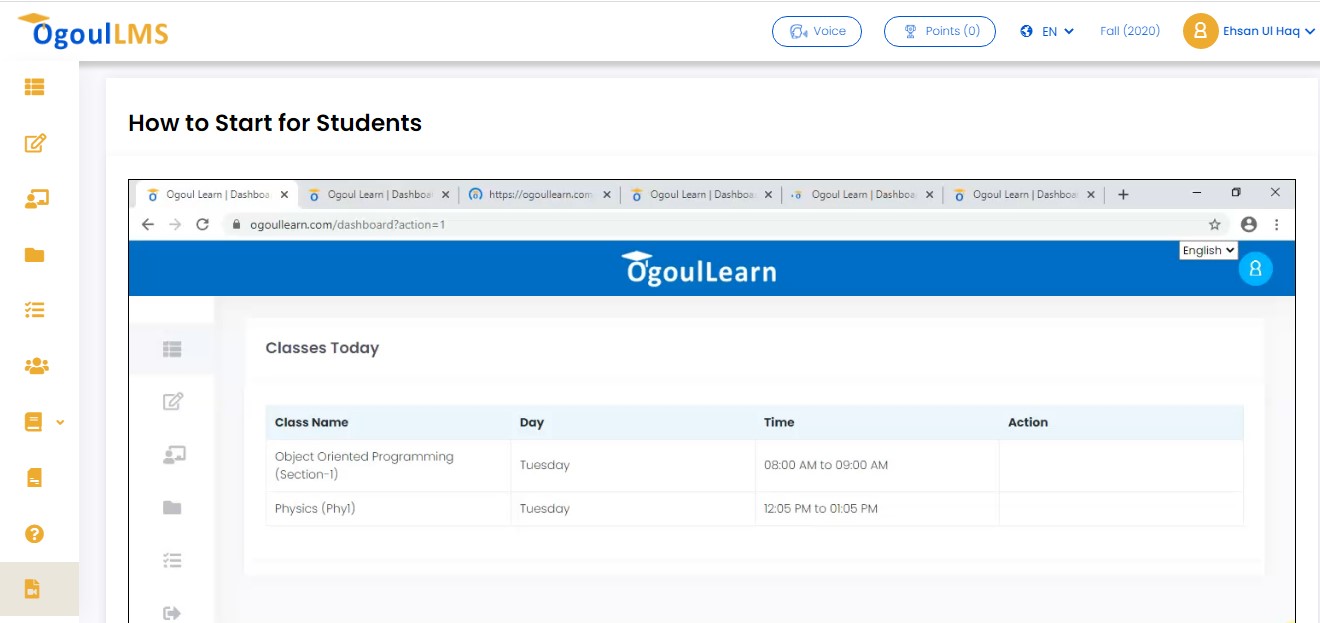
OgoulLMS allows its students to watch tutorial, to make sure about something watch Tutorial on OgoulLMS portal. To access the tutorial,
-
Move your cursor to the left side of the screen and click on the “Tutorial” button.

-
Tutorial will start playing on your screen.
OgoulLMS keeps a record of all the assignments that a student has to submit along with the deadlines to make sure that students can easily complete their work. To see your assignments,
-
Move your cursor to the left side of the screen and click on the “Assignments” button.
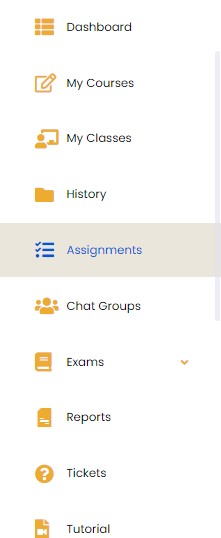
- View the details of your Assignments.
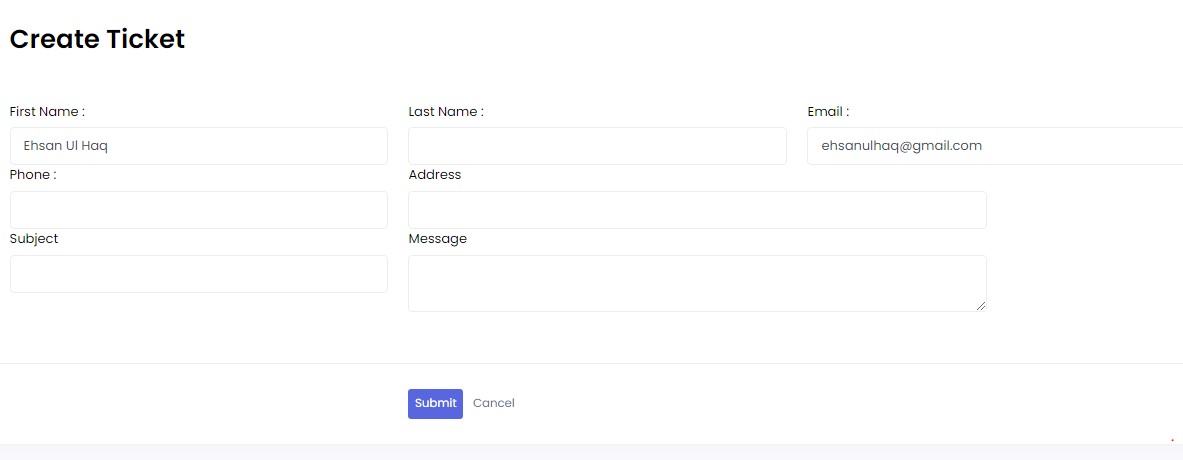
To create tickets on the OgoulLMS, follow the following steps:
-
Move your cursor to the left side of the screen and click on the “Tickets” button.

-
Click on the ‘Create Tickets’ option from the screen.

- Fill the required information from the screen.
-
Click on the purple colored ‘Submit’ button.
OgoulLMS makes sure that people are using this app comfortably. At times people are not able to find simple features. To make sure about something, visit FAQs section in OgoulLMS. Following are the steps:
-
Move your cursor to the left side of the screen, scroll down and click on the “FAQs” button.

-
A list of FAQs will open up in front of you

OgoulLMS enables you to logout easily. To logout, follow the following steps:
-
Move your cursor to the left side of the screen and click on the “Logout” button.

OgoulLMS FAQs - Teacher
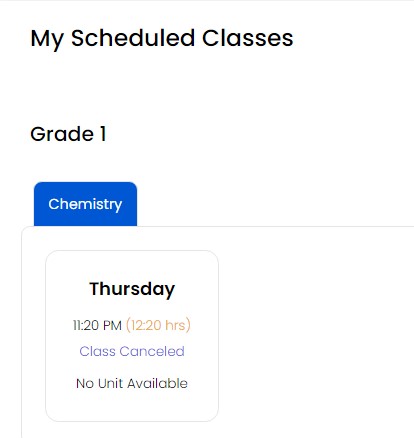
OgoulLMS allow its users to view the scheduled classes. Follow the following steps:
-
Go to the left side bar menu and select ‘All Grades’ option.

-
From there a new screen will open up and show you your today’s scheduled timetable of classes.
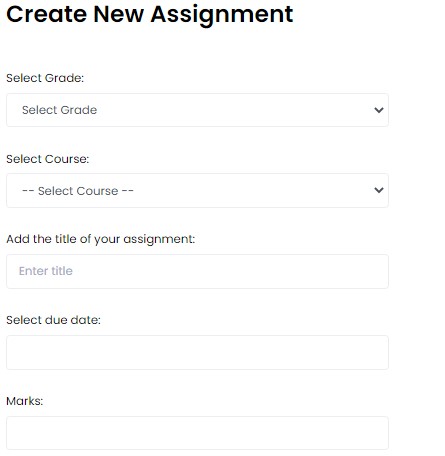
It is convenient to create assignments for your students and upload them on portal. Follow the following steps to create an assignment:
-
Go to the left side bar menu and select ‘My Assignments’ option..

-
From the right top corner of the screen, click on ‘Create New’ button.

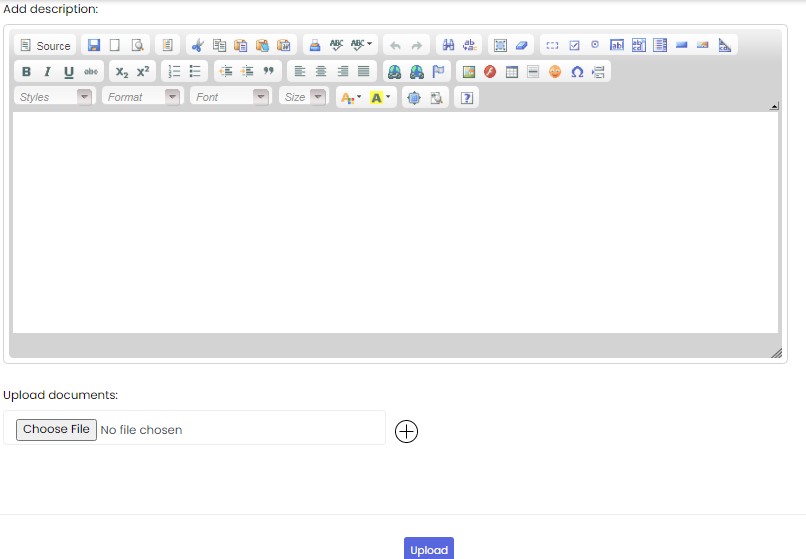
- Fill all the requirements from the new screen.
-
Click on the purple colored ‘Upload’ button.
-
Go to the left side bar menu and select ‘My Assignments’ option.

-
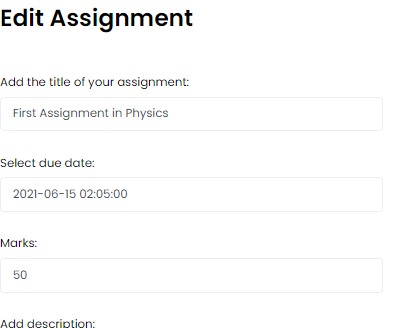
Click on the ‘Edit’ button under the ‘Actions’ column.

-
Edit the assignment from the screen.
-
After editing it, click on the purple colored ‘Update’ button.
-
Go to the left side bar menu and select ‘My Assignments’ option.

-
Click on the ‘Delete’ button under the ‘Actions’ column.

-
Delete the assignment by clicking on the ‘OK’ button from the pop up notification.

-
Go to the left side bar menu and select ‘Chat Groups’ option.

-
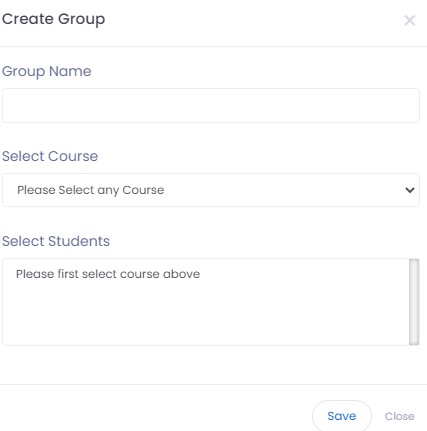
Click on the ‘Add Group’ option from the left side of the screen.

-
Fill the requirements from the screen and click on the ‘Save’ button.
-
Go to the left side bar menu and select ‘Students’ option.

-
The screen will start showing the available student’s record.

-
Click on the dashboard option on the top-left side of the portal.

- An option of downward arrow will be given with the English option at the top navigation bar.
-
Open it, select a language name from the opened list and you will be switched to the other language.

OgoulLMS allows teacher view the question paper. To view those, you need to follow the following steps:
- Click on the left side of the page. A menu will open.
-
From this menu, scroll down and click on “Question Paper”.

-
You will be able to view the question paper list.

OgoulLMS allows teacher result sheet. To view those, you need to follow the following steps:
- Click on the left side of the page. A menu will open.
-
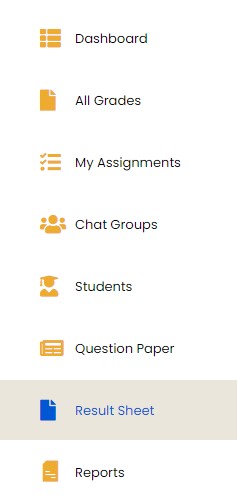
From this menu, scroll down and click on “Result Sheet”.
-
You will be able to view the result sheet list.

OgoulLMS allows teacher create the question paper. To create that, you need to follow the following steps:
- Click on the left side of the page. A menu will open.
-
From this menu, scroll down and click on “Question Paper”.

-
You will be able to view the question paper list.

- Click on “Add New Record” button at the top right corner.
- We can import the question paper from storage as well by clicking on “Import Question”
-
Create Question Book form will be visible to you.
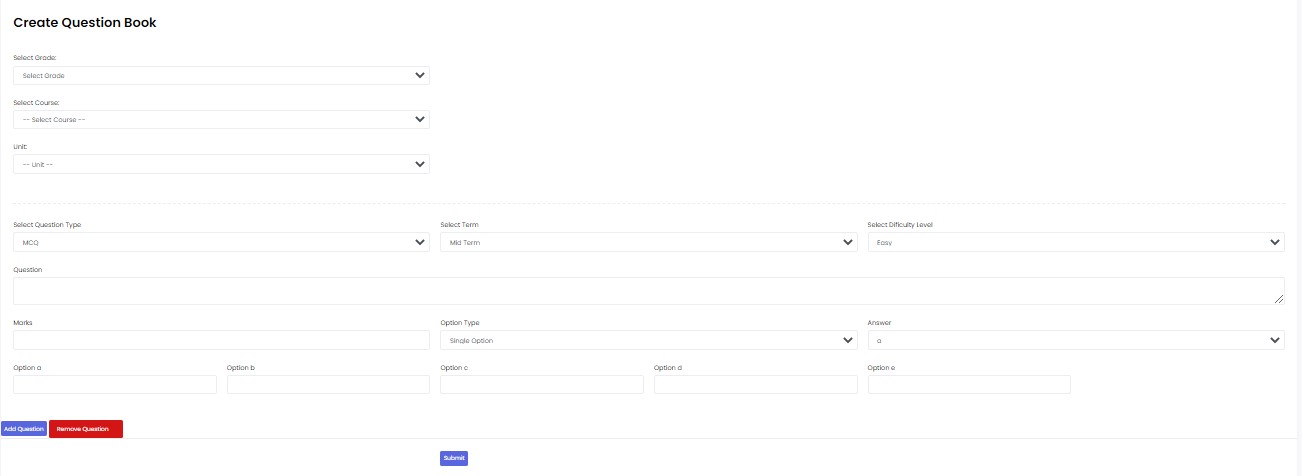
- Fill the required fields. We can also add questions of different types like MCQs, Short Questions and Long Questions.
- Now click on “Submit” button.
- Question paper will be added in the list.
OgoulLMS allows teachers to create tickets to post theirs concerns. For this, you need to follow the following steps:
- Click on the left side of the page. A menu will open.
-
From this menu, scroll down and click on “Tickets”.
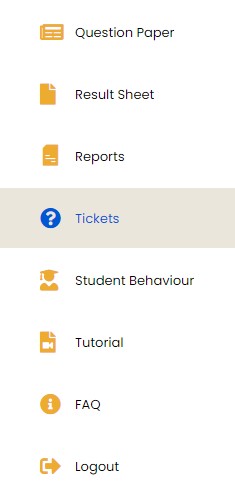
- A list of tickets will be shown to you on the screen.
- Click on “Create Ticket” button at the top right corner of the page.
-
Create ticket form will be opened in front of you.
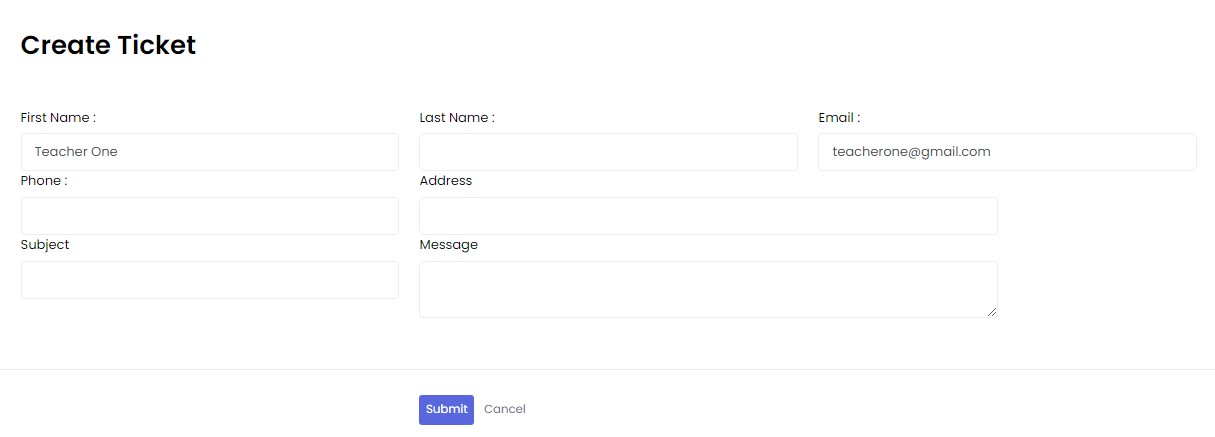
- Fill the form with the relevant information and click on “Submit” button.
-
Confirmation popup will be shown.

-
Ticket will be added and shown to on the screen.

OgoulLMS allows teacher to view student behavior reports. Teacher can view those reports. For this, you need to follow the following steps:
- Click on the left side of the page. A menu will open.
-
From this menu, click on “Student Behaviour”.
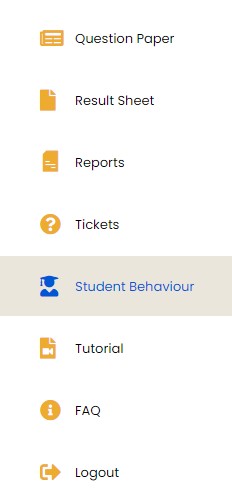
- Student Behavior Report will be show to you.
OgoulLMS allows teacher to view attendance. To view the attendance, you need to follow the following steps:
- Click on the left side of the page. A menu will open.
-
From this menu, click on “Reports”.

-
You will be able to view the reports.

- Click on the blue colored ‘Attendance Report” option.
-
Attendance Report will be shown to you

OgoulLMS allows its teachers to watch tutorial, to make sure about something watch Tutorial on OgoulLMS portal. To access the tutorial,
-
Move your cursor to the left side of the screen, scroll down and click on the “Tutorial” button.

-
From this menu, scroll down and click on “Question Paper”.

- Click on start button to play the tutorial on your screen.
OgoulLMS makes sure that people are using this app comfortably. At times people are not able to find simple features. To make sure about something, visit FAQs section in OgoulLMS. Following are the steps:
-
Move your cursor to the left side of the screen, scroll down and click on the “FAQs” button.

-
A list of FAQs will open up in front of you

OgoulLMS enables you to logout easily. To logout, follow the following steps:
-
Move your cursor to the left side of the screen and click on the “Logout” button.

- You will be logged out from the OgoulLMS.
OgoulLMS FAQs - Proctor
Proctor can see the list of exams of current day on his dashboard. A button called “Start Exam” will be shown next to the exam just 15 minutes before v time of the exam.
As the proctor clicks “Start Exam” button, a video call request will be sent to all the students who are included in that exam group / session. And when exam will be ended, the status of that exam will be changed to “Ended”.
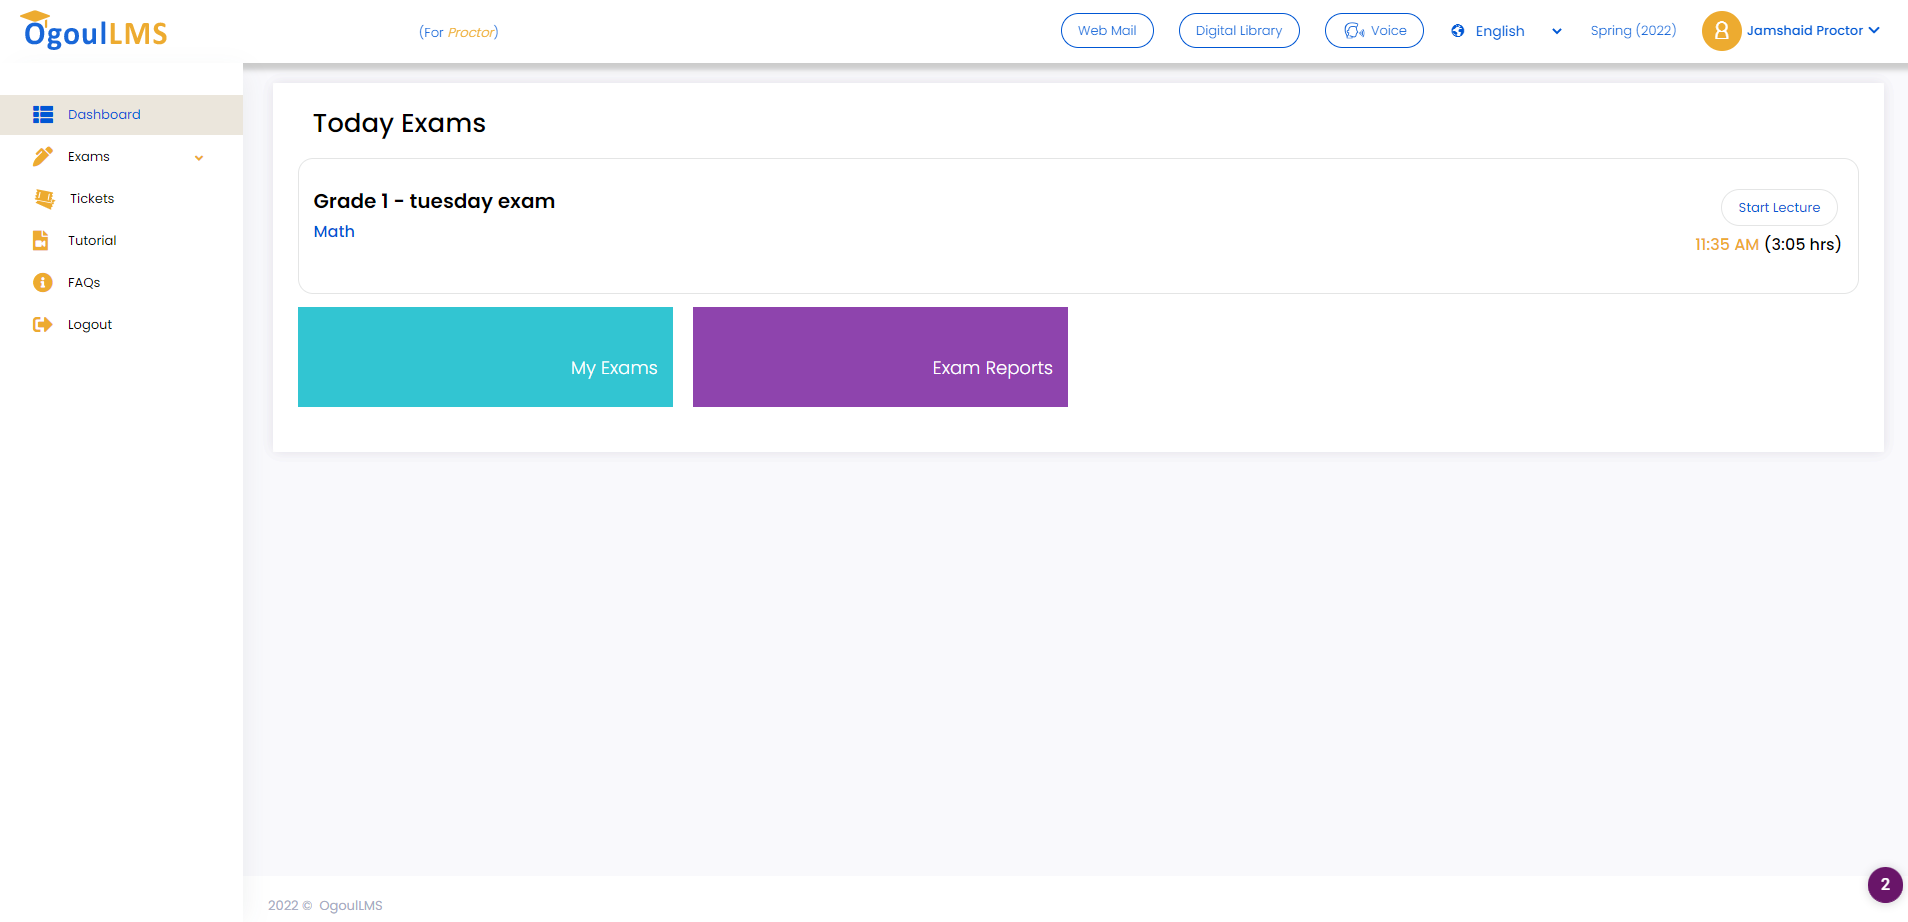
Proctor can see the list of all his exams (previous / upcoming) on the same page. Click the following link on left menu My Exams

OgoulLMS FAQs - Driver
In order get logged in to account, driver must be added by the school. School is able to add new drivers, manage them and delete any driver.
As the school has added a new driver, the driver account will be accessible to the driver and now driver can log in through the app.
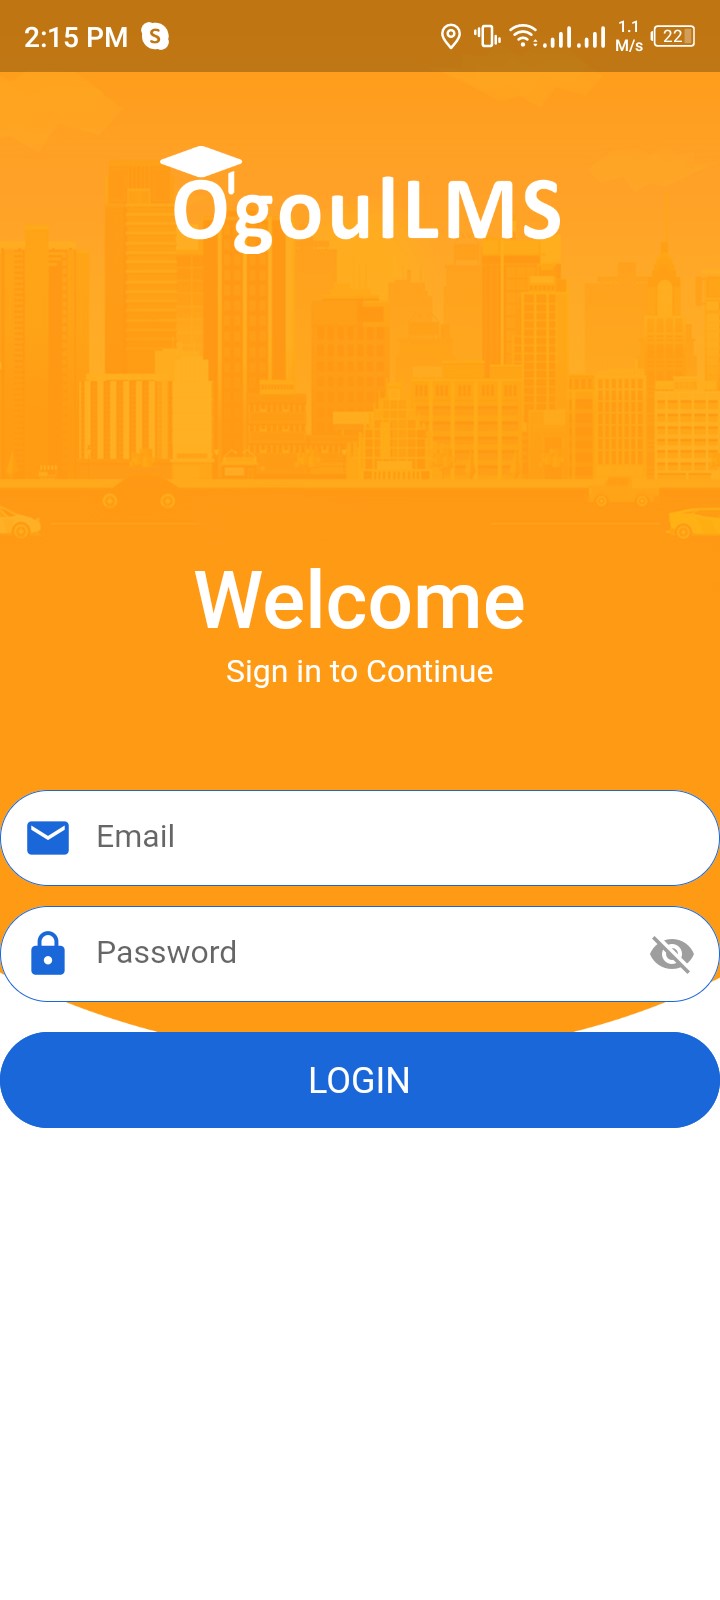
Driver will fill out his email and password on the Log in page and click on the blue colored “LOGIN” button. Account is logged in successfully.
Ogoul LMS provides feature of Transport through which school is able to manage its transportation section. Under transportation, school is also able to add new driver. In order to create new driver, school needs to follow the steps as described below:
-
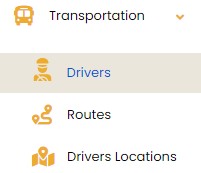
From the left side menu of dashboard, expand the “Transportation”. Here school gets the sub menu. From this sub menu select “Drivers”.
-
Clicking Drivers will open up new page showing the list of drivers added by the school and options to manage added driver.

-
Click on the “Add New Driver” button on the top right corner of the Drivers page.

-
“Create Driver” page will open, here school will fill out all the fields required to create a new driver. Once all the fields filled, click on the blue colored “Submit”. New driver is added to the drivers list successfully.
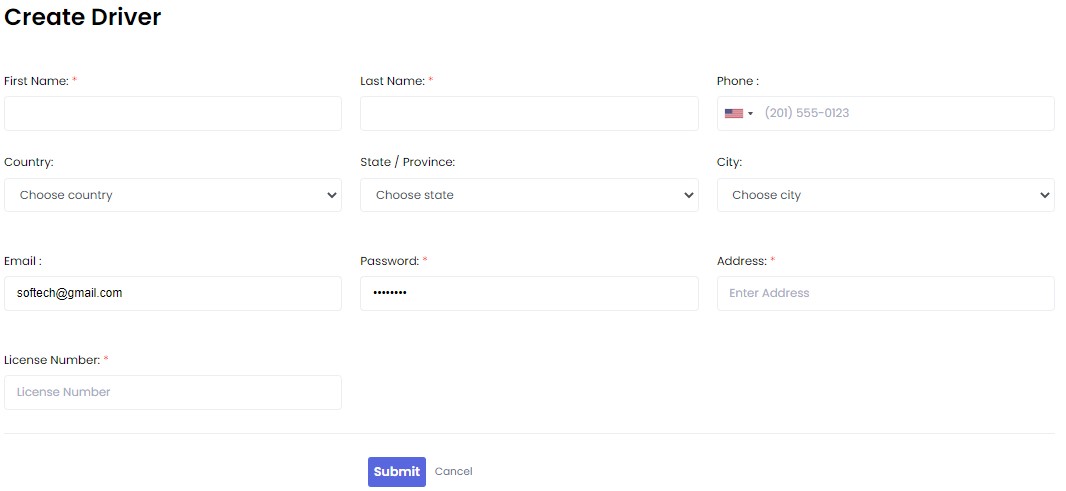
Once driver created, school is able to update information of the driver. Here following steps need to be followed to do so:
-
Click on the “Edit” under the Actions column of the driver list table.

-
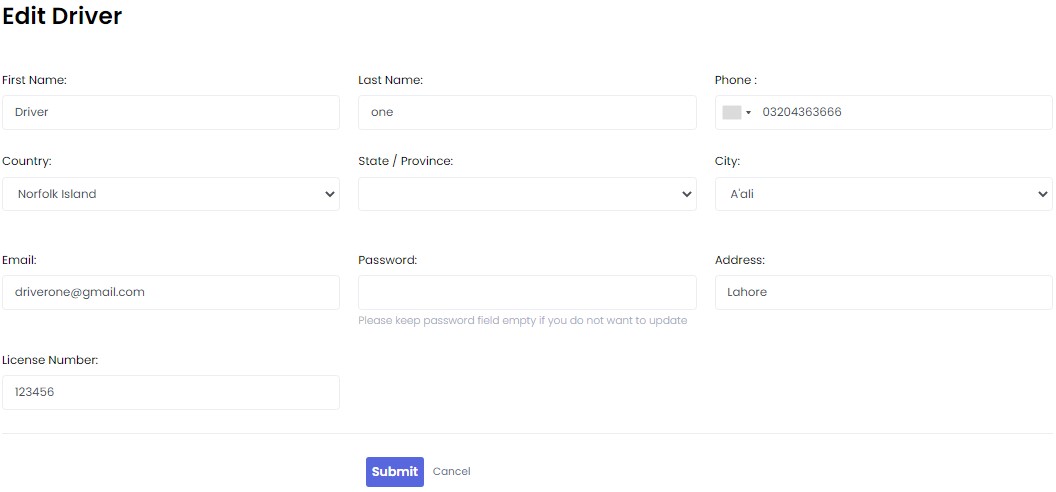
Edit Driver page will open up. Here update the fields, you need to get changed. Once updated the fields, click on the blue colored “Submit” button. Driver is updated successfully.
In Ogoul LMS, school has to add routes which the driver will follow up. Under this feature school is able to add route, delete route, manage route and assign route to the driver.
In order to add new route school will follow these steps:
-
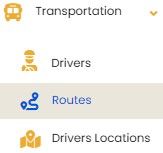
From the left side menu of dashboard, expand the “Transportation”. Here school gets the sub menu. From this sub menu select “Drivers Location”.
-
Clicking Routes will open up new page showing the list of routes added by the school and options to manage added routes.

-
On this page, click on the “Add New Route” button on the top right corner of the Routes page.

-
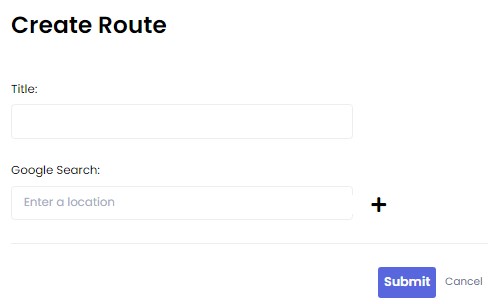
Create Route” page will open. Here school will enter the title of the route and single or multiple locations. Once the fields filled, click on the blue colored “Submit”. New route is added to the routes list successfully.
Once the route has been added to the routes list, school can view, delete and edit these routes.
-
Click on the “Assign Route” under the Actions column of the routes list table.

-
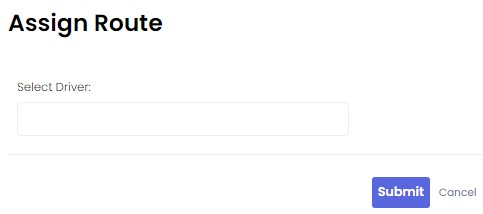
Assign route page will open up. Here select the driver to whom you want to assign the route. Once driver is selected, click on the blue colored “Submit” button. Route is assigned successfully.
-
School is also to see the list of drivers to which it has assigned the roots on the same page of assigning route.

Once the route has been added to the routes list, school can view, delete and edit these routes.

In order to do so, following steps must need to be followed:
-
See the Actions column of the routes list table. From here school can:
-
View Route
Edit Route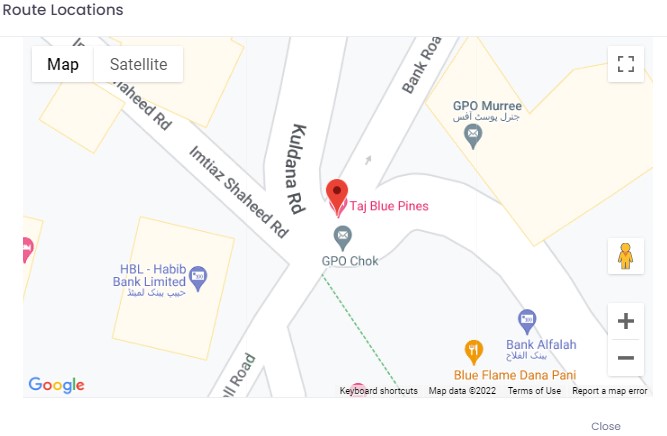
Delete Route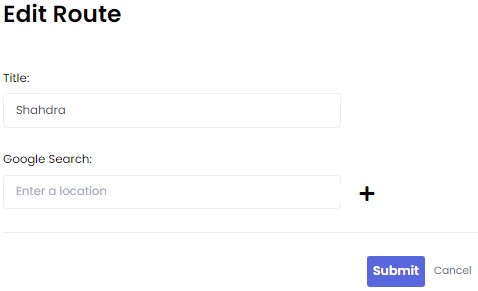
In Ogoul LMS, school can see locations of the drivers added by it. In order to view location school will follow these steps:
-
From the left side menu of dashboard, expand the “Transportation”. Here school gets the sub menu. From this sub menu select “Drivers Location”.
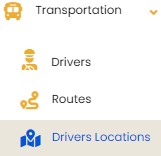
-
Clicking Drivers Location will open up the map showing the locations of the drivers added by the school.
